Detailed Configuration - Step by step
In this tutorial we will be using the same Trivialissimo example as the previous tutorials but will explain
the detailed configuration of the inputs and outputs, a process known as Equivalence Class Partitioning.
how we complete the test case definitions.
Github
You can find the code relating to this tutorial on Github in the /java/util/trivialissimo folder.
Requirements
Here are the same requirements for our function as we had in the previous tutorials.
It receives a positive integer as string type, not as an integer. It should return the value as an integer type.
Valid cases would be
- “10” (any other valid string representation of an integer)
Invalid cases, which should throw an exception, are
- decimal string values such as “10.1”
- zero “0”
- any non-integer text strings such as “ten” or “xxx”
Has DevMate seen the same/similar method before?
DevMate checks the codebase to see if it might have seen a similar method elsewhere. If it has, it will pre-populate the methods as best it can. Please refer to Recommendation Engine for more information.
If you’ve just started using DevMate then you will see the following.
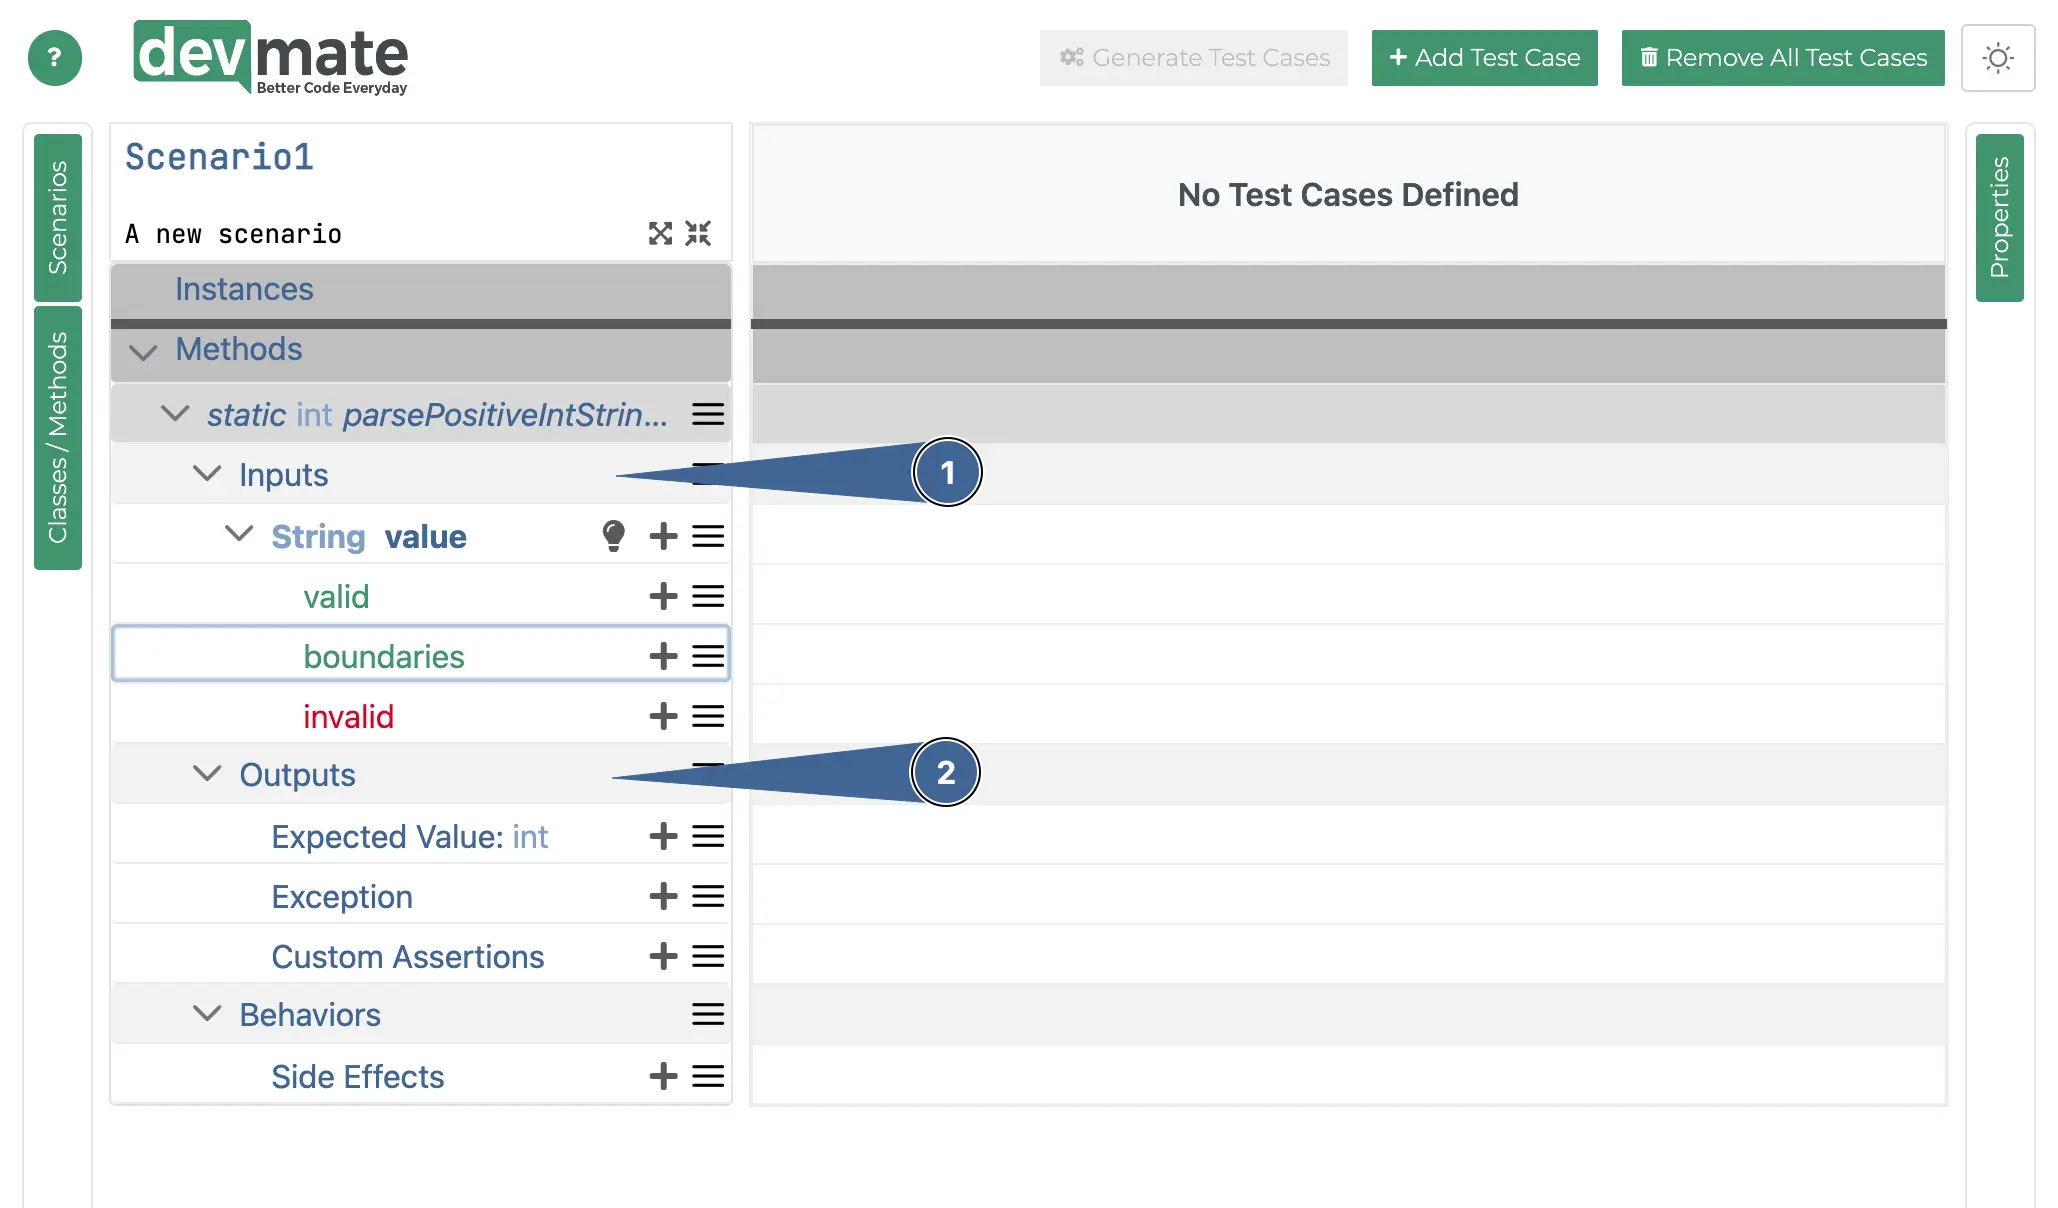
We are first going to concentrate on defining all Inputs we need to define in order to meet the requirements specification. Looking at our requirements, we have the following cases.
Requirement | Type | Input | Expected Output |
|---|---|---|---|
| Valid |
|
|
| Invalid |
| Exception |
| Invalid |
| Exception |
| Invalid |
| Exception |
Equivalence Classes
Each of the rows in this table is a so-called Equivalence Class.
If we look at the first and last rows of this table, we can see that each row mentions two possible values as examples.
"10","55""ten","any string"
The idea behind an Equivalence Class is that we choose only one value if all the values are just testing the same case or the same piece of code.
For example "10" and "55" are both really testing the same code - any positive string representation of an integer. So, when defining our Inputs, we only need use one value, called a Representative.
The second row (Equivalence Class) tests a floating point number in string format.
The third row checks for the special case of "0", which is also not acceptable. This could also be considered to be a "Boundary Condition” , which we’ll explore in the next tutorial.
Inputs
There are various ways to add an Equivalence Class input.
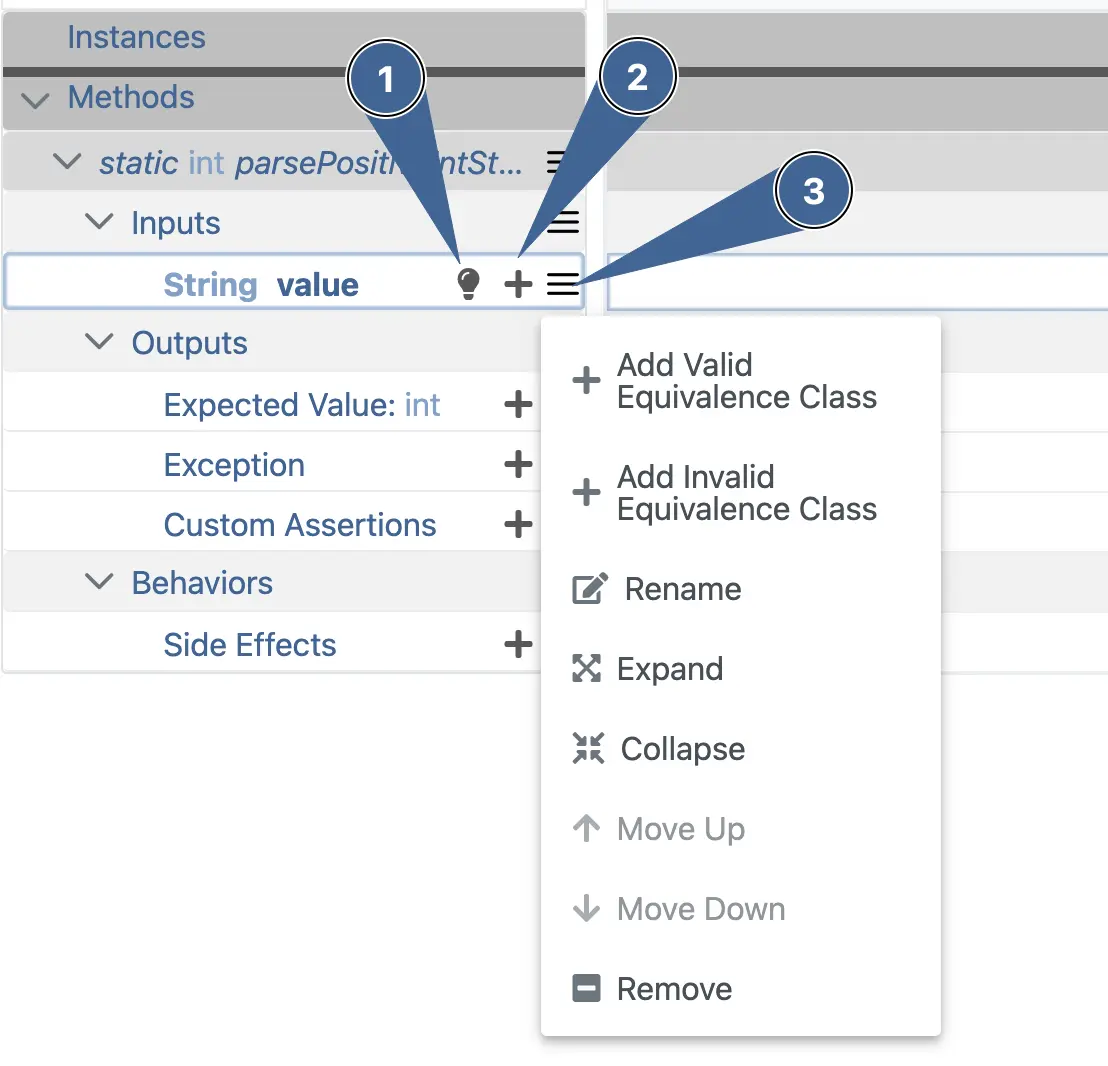
The lightbulb icon tells DevMate to scan our codebase and see if there is a way of deducing a possible value. We’ll skip over this for now but you can read more about this here.
The + button will add a new Valid Equivalence Class.
The hamburger icon allows you to choose whether to add a Valid or Invalid Equivalence Class (or remove one).
Adding/Editing a valid Equivalence Class
You can, at any time, add a new valid Equivalence Class by clicking on the + icon. You’ll see it creates a new valid entry. You should already have one as DevMate automatically creates one for you.
You can rename this to anything you like. You might want to do this to make things clearer in the UI but also when the tests run. You don’t need to do this now.
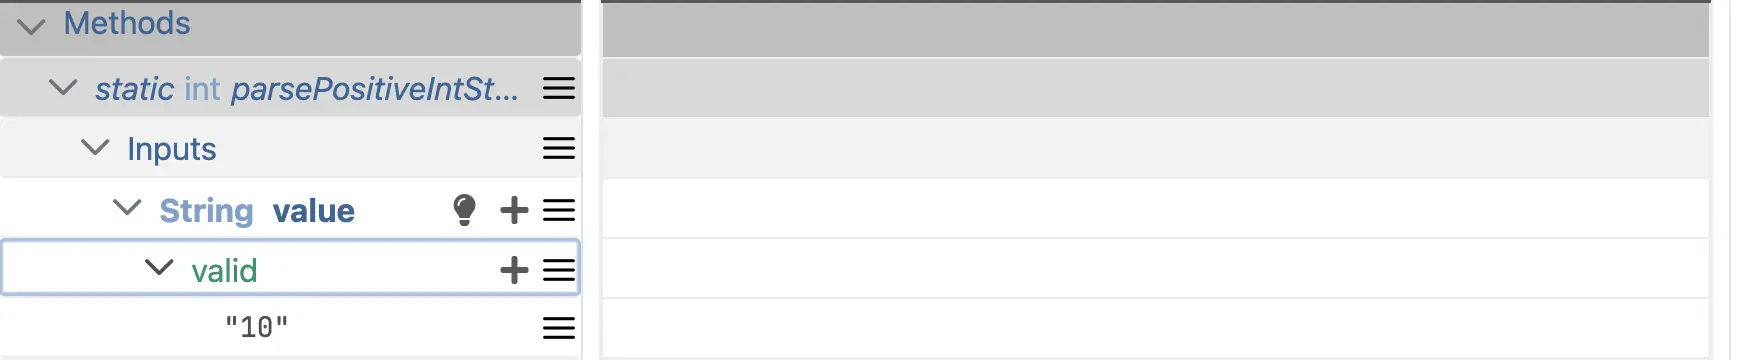
Adding a Representative
A representative is a value that represents the Equivalence Class. In our case, we want to choose "10". You can add more than one Representative per Equivalence Class but should only add the ones you really need.
Click on the + icon next to ‘valid’ and enter
"10". DevMate knows this is a string type, so it will display in quotes.
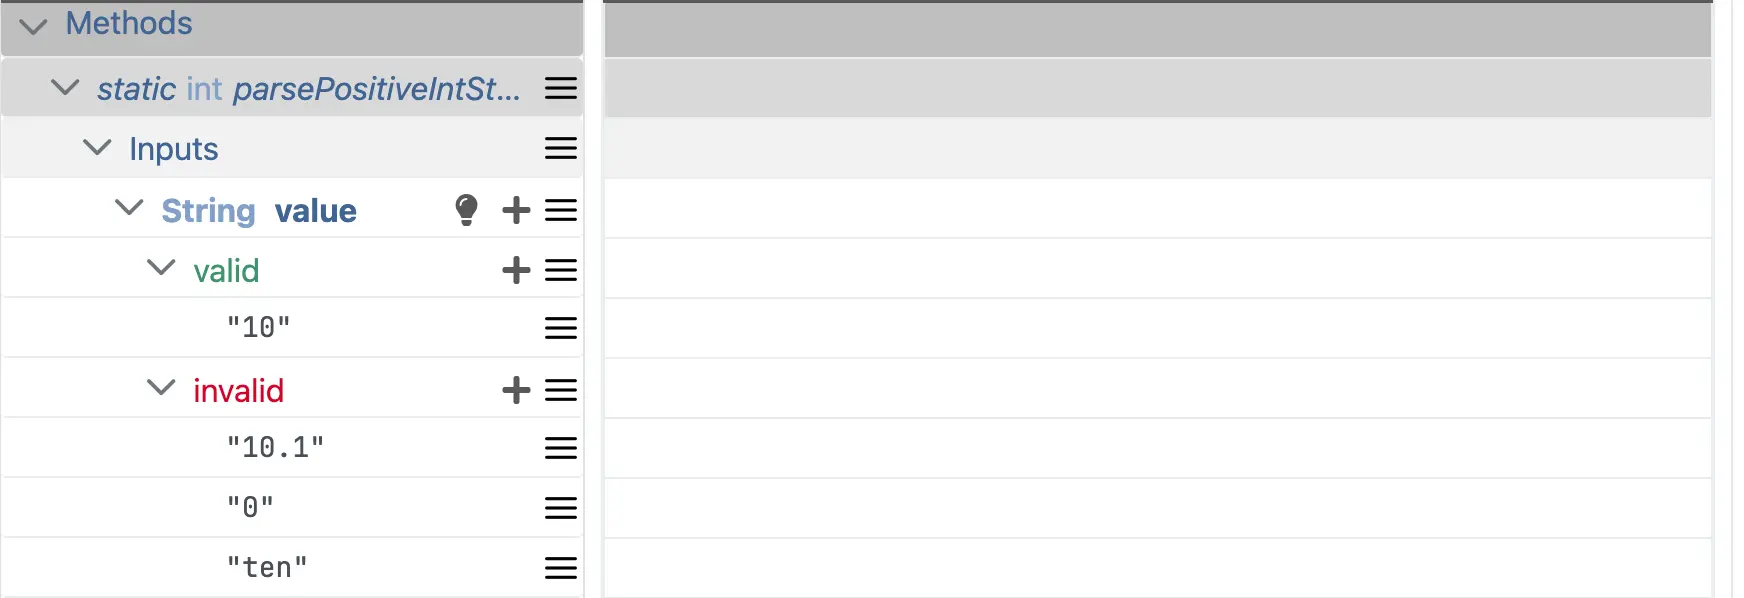
Adding the invalid Equivalence Class and its Representatives
We follow the same approach to define the invalid Equivalence Classes and Representatives. If you refer back to the table above, you can see we need three invalid Representatives..
If not already present, use the hamburger icon next to
String valueto add an invalid Equivalence Class. You can also toggle between valid and invalid from this popup menu.Next to the newly created Invalid entry, press the + button three times, adding in the requirements led cases of
"10.1","0"and"ten". It should now look like this.
Remove the boundaries Equivalence Class
You don’t actually need to do this, but you could remove the boundaries Equivalence Class that DevMate creates for you automatically. We will discuss Boundaries in more detail shortly.
Press the hamburger icon next to boundaries and then Remove.
Output Equivalence Classes

You will see three Output categories
Expected value : values we expect to be returned from the method under test. In our case we only return valid values. All other test cases should throw an exception. However, methods might return invalid values rather than Exceptions. In this case we would define Output Equivalence Classes and their Representatives here.
Exception : we add Equivalence Class here when you expect an Exception to be thrown by the method under test. You can test for all Exceptions or specific exception subclasses as explained in the Exceptions tutorial.
Custom Assertions : this allows you to write code to handle your assertion as explained in the Custom Assertions tutorial.
Following the same approach for adding Equivalence Classes as we did with the Inputs, let’s add the following under Outputs (see screenshot below).
In the Expected Value row, add a valid Equivalence Class with value
"10".In the Exceptions row, add an invalid Equivalence Class and, within it, add an entry with the + button. It will default to a value of
Exception, which we will be using. Note that it is possible to select an Exception subclass from the dropdown (see Exceptions tutorial).
Your dialog should now look like this. We’re ready to generate test cases.
Generate Test Cases
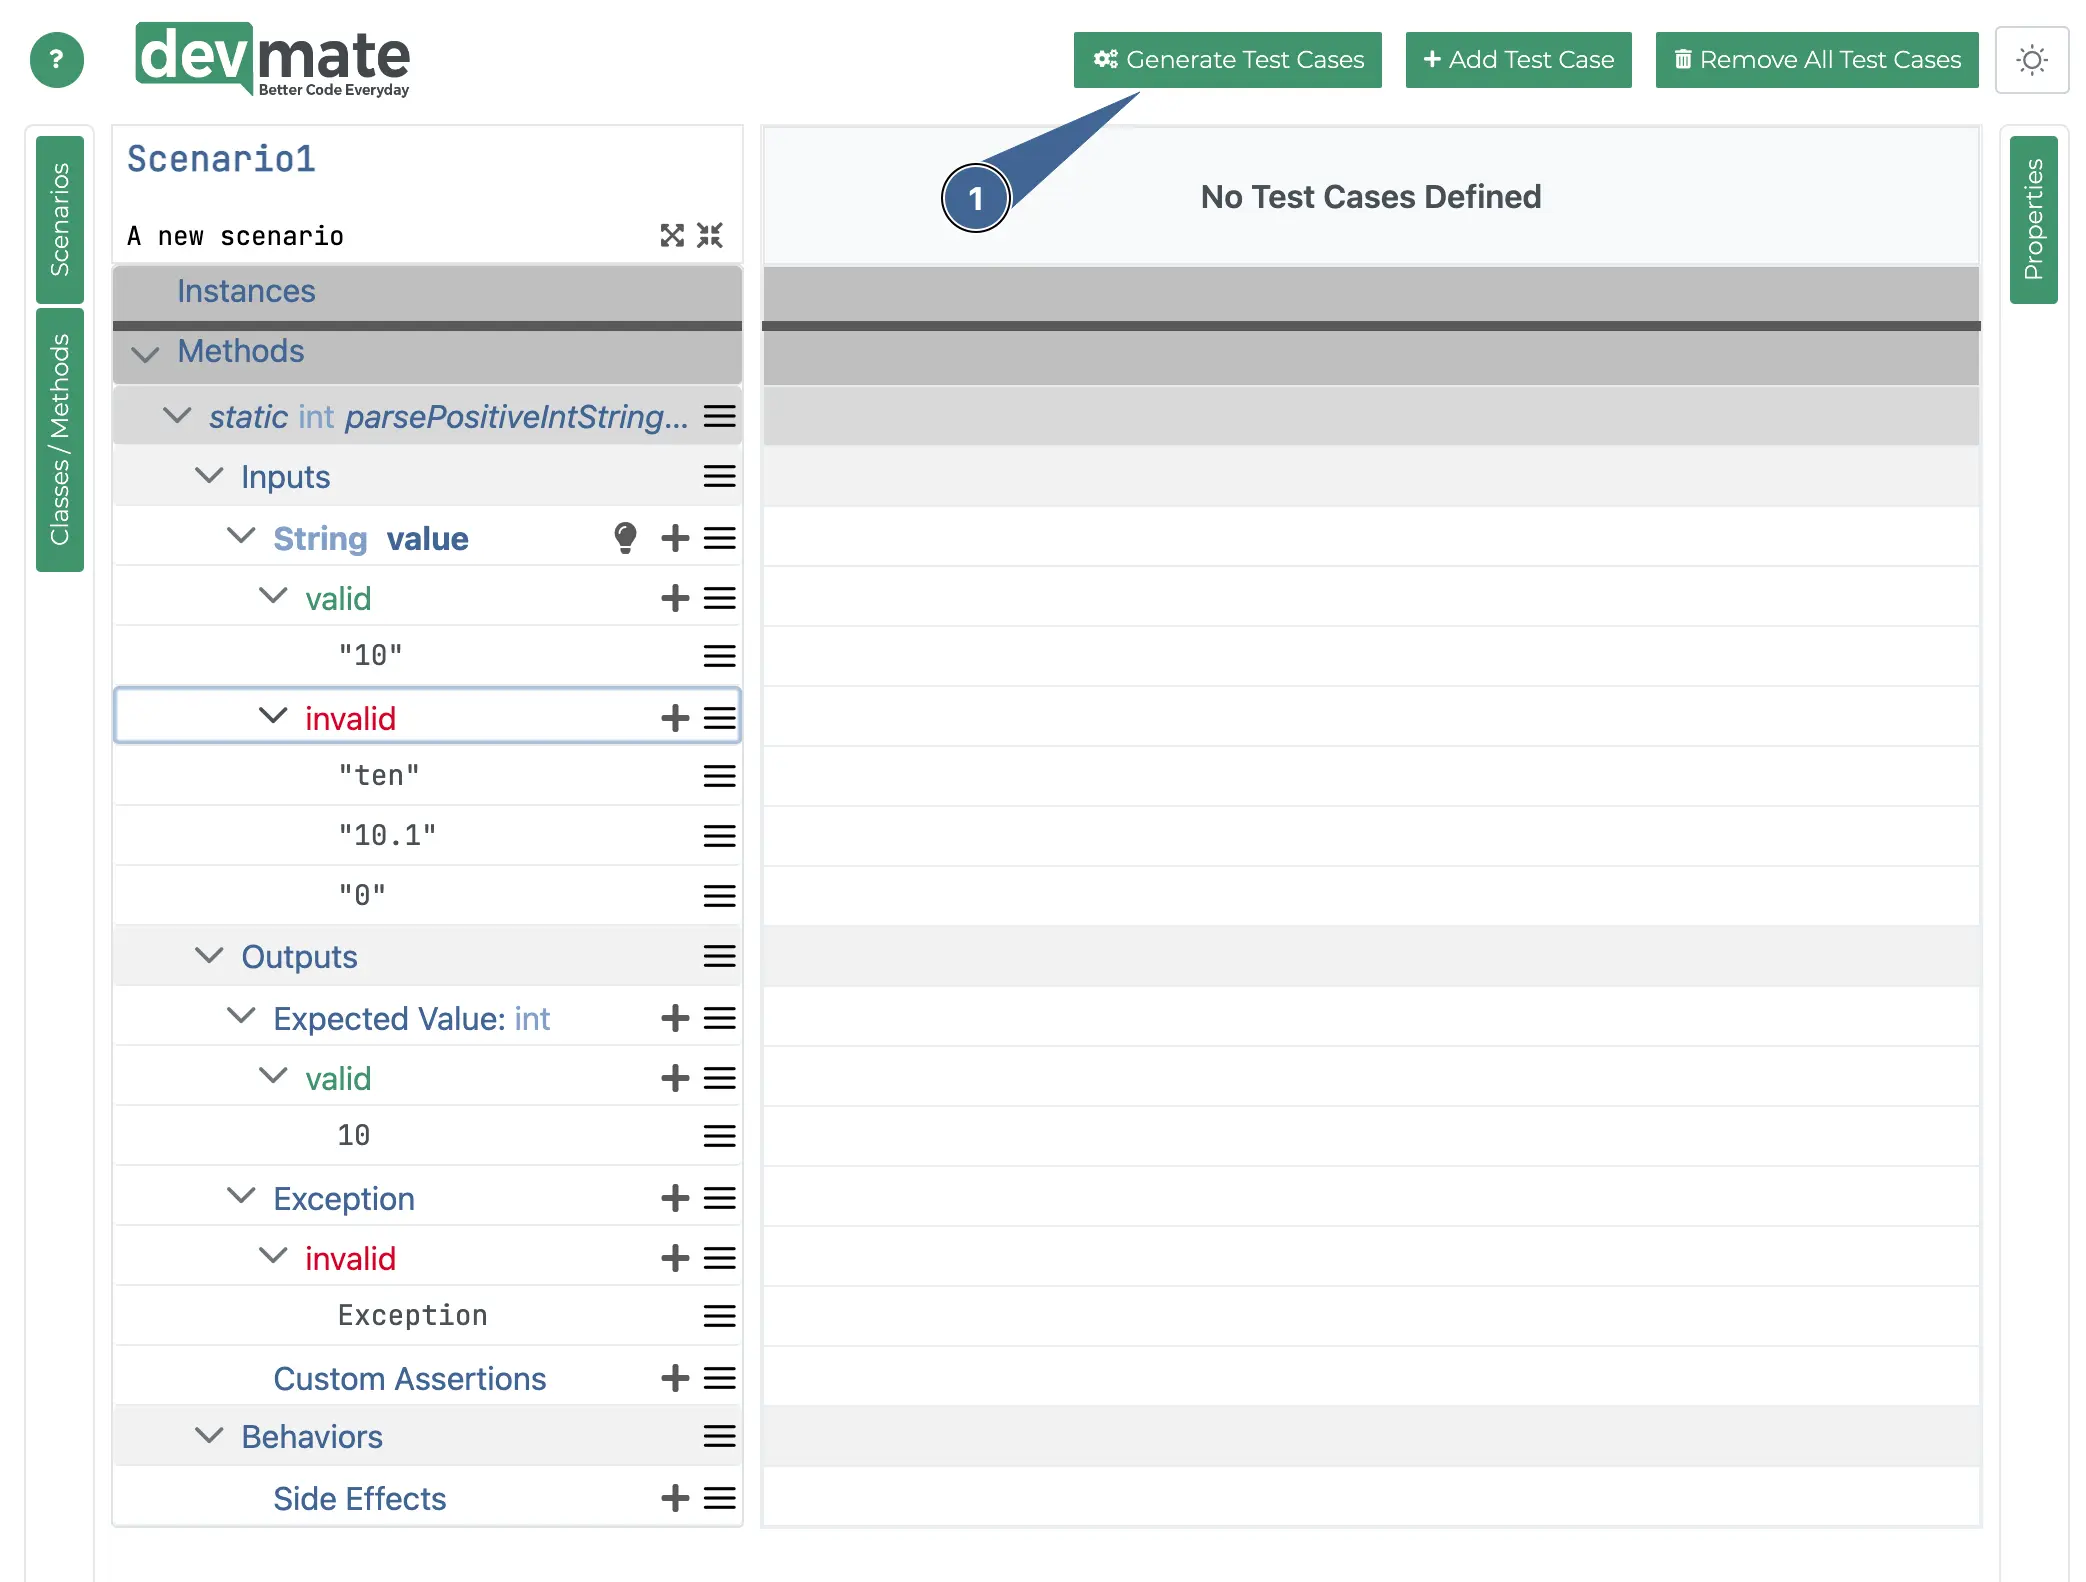
We are now ready to generate our test cases.
Press the Generate Test Cases button at the top of the dialog. DevMate then calculates the minimum number of test cases needed to satisfy the requirements. The dialog will look like this.
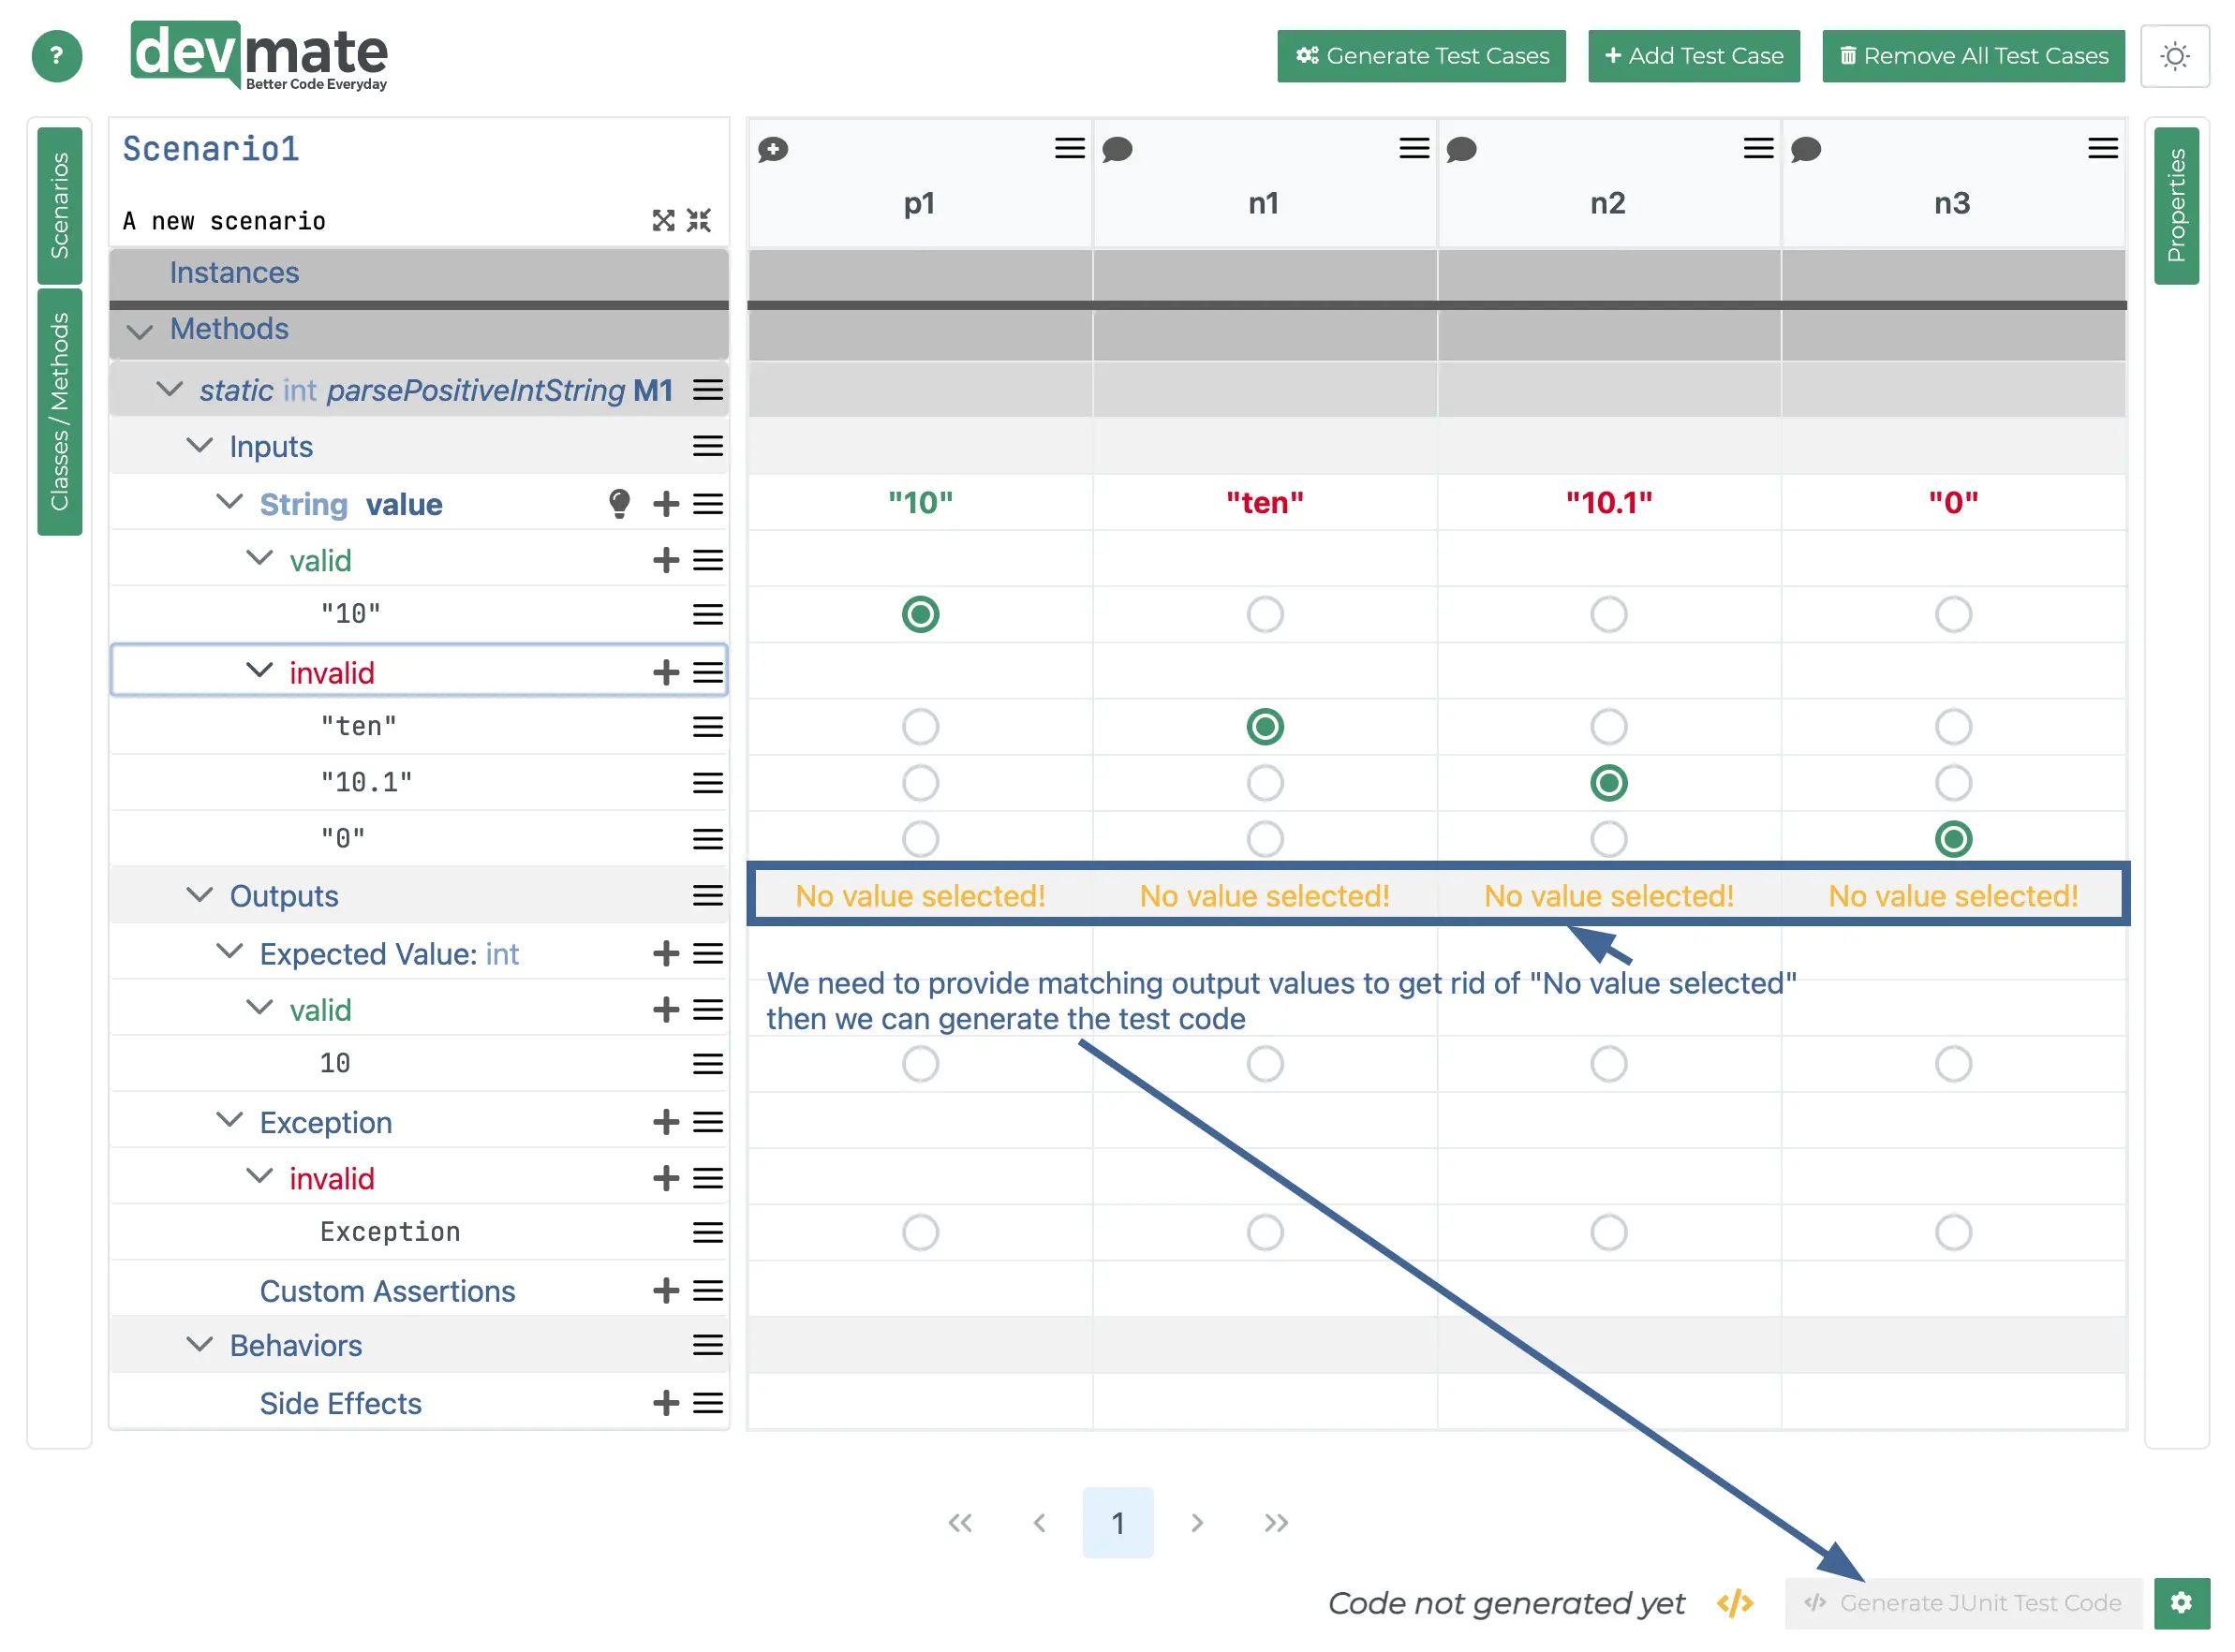
We now need to make sure DevMate knows what Output Representative should be be used for a given Input.
Each test case generated by DevMate is displayed in a column. You’ll see that the Generate Test Code button is disabled. That’s because we first need to match the output values with a corresponding input.
We do this by clicking the radio buttons in each test case column. Please see the screenshot below.
Let’s deal with column p1 (which stands for “Positive case 1” and can be renamed by 2x clicking). Click the radio button in the row Output → Expected Value → Valid → 10. You’ll see that No value selected! disappears.
For each of the other test cases n1 to n3 (n meaning negative), we expect an
Exceptionto be thrown, so click the Exception -> Invalid -> Exception radio button.
Each time you do this, you’ll notice that No value selected! disappears. Once all four cases have been dealt with, the Generate Test Code button is enabled and we can generate the test code.
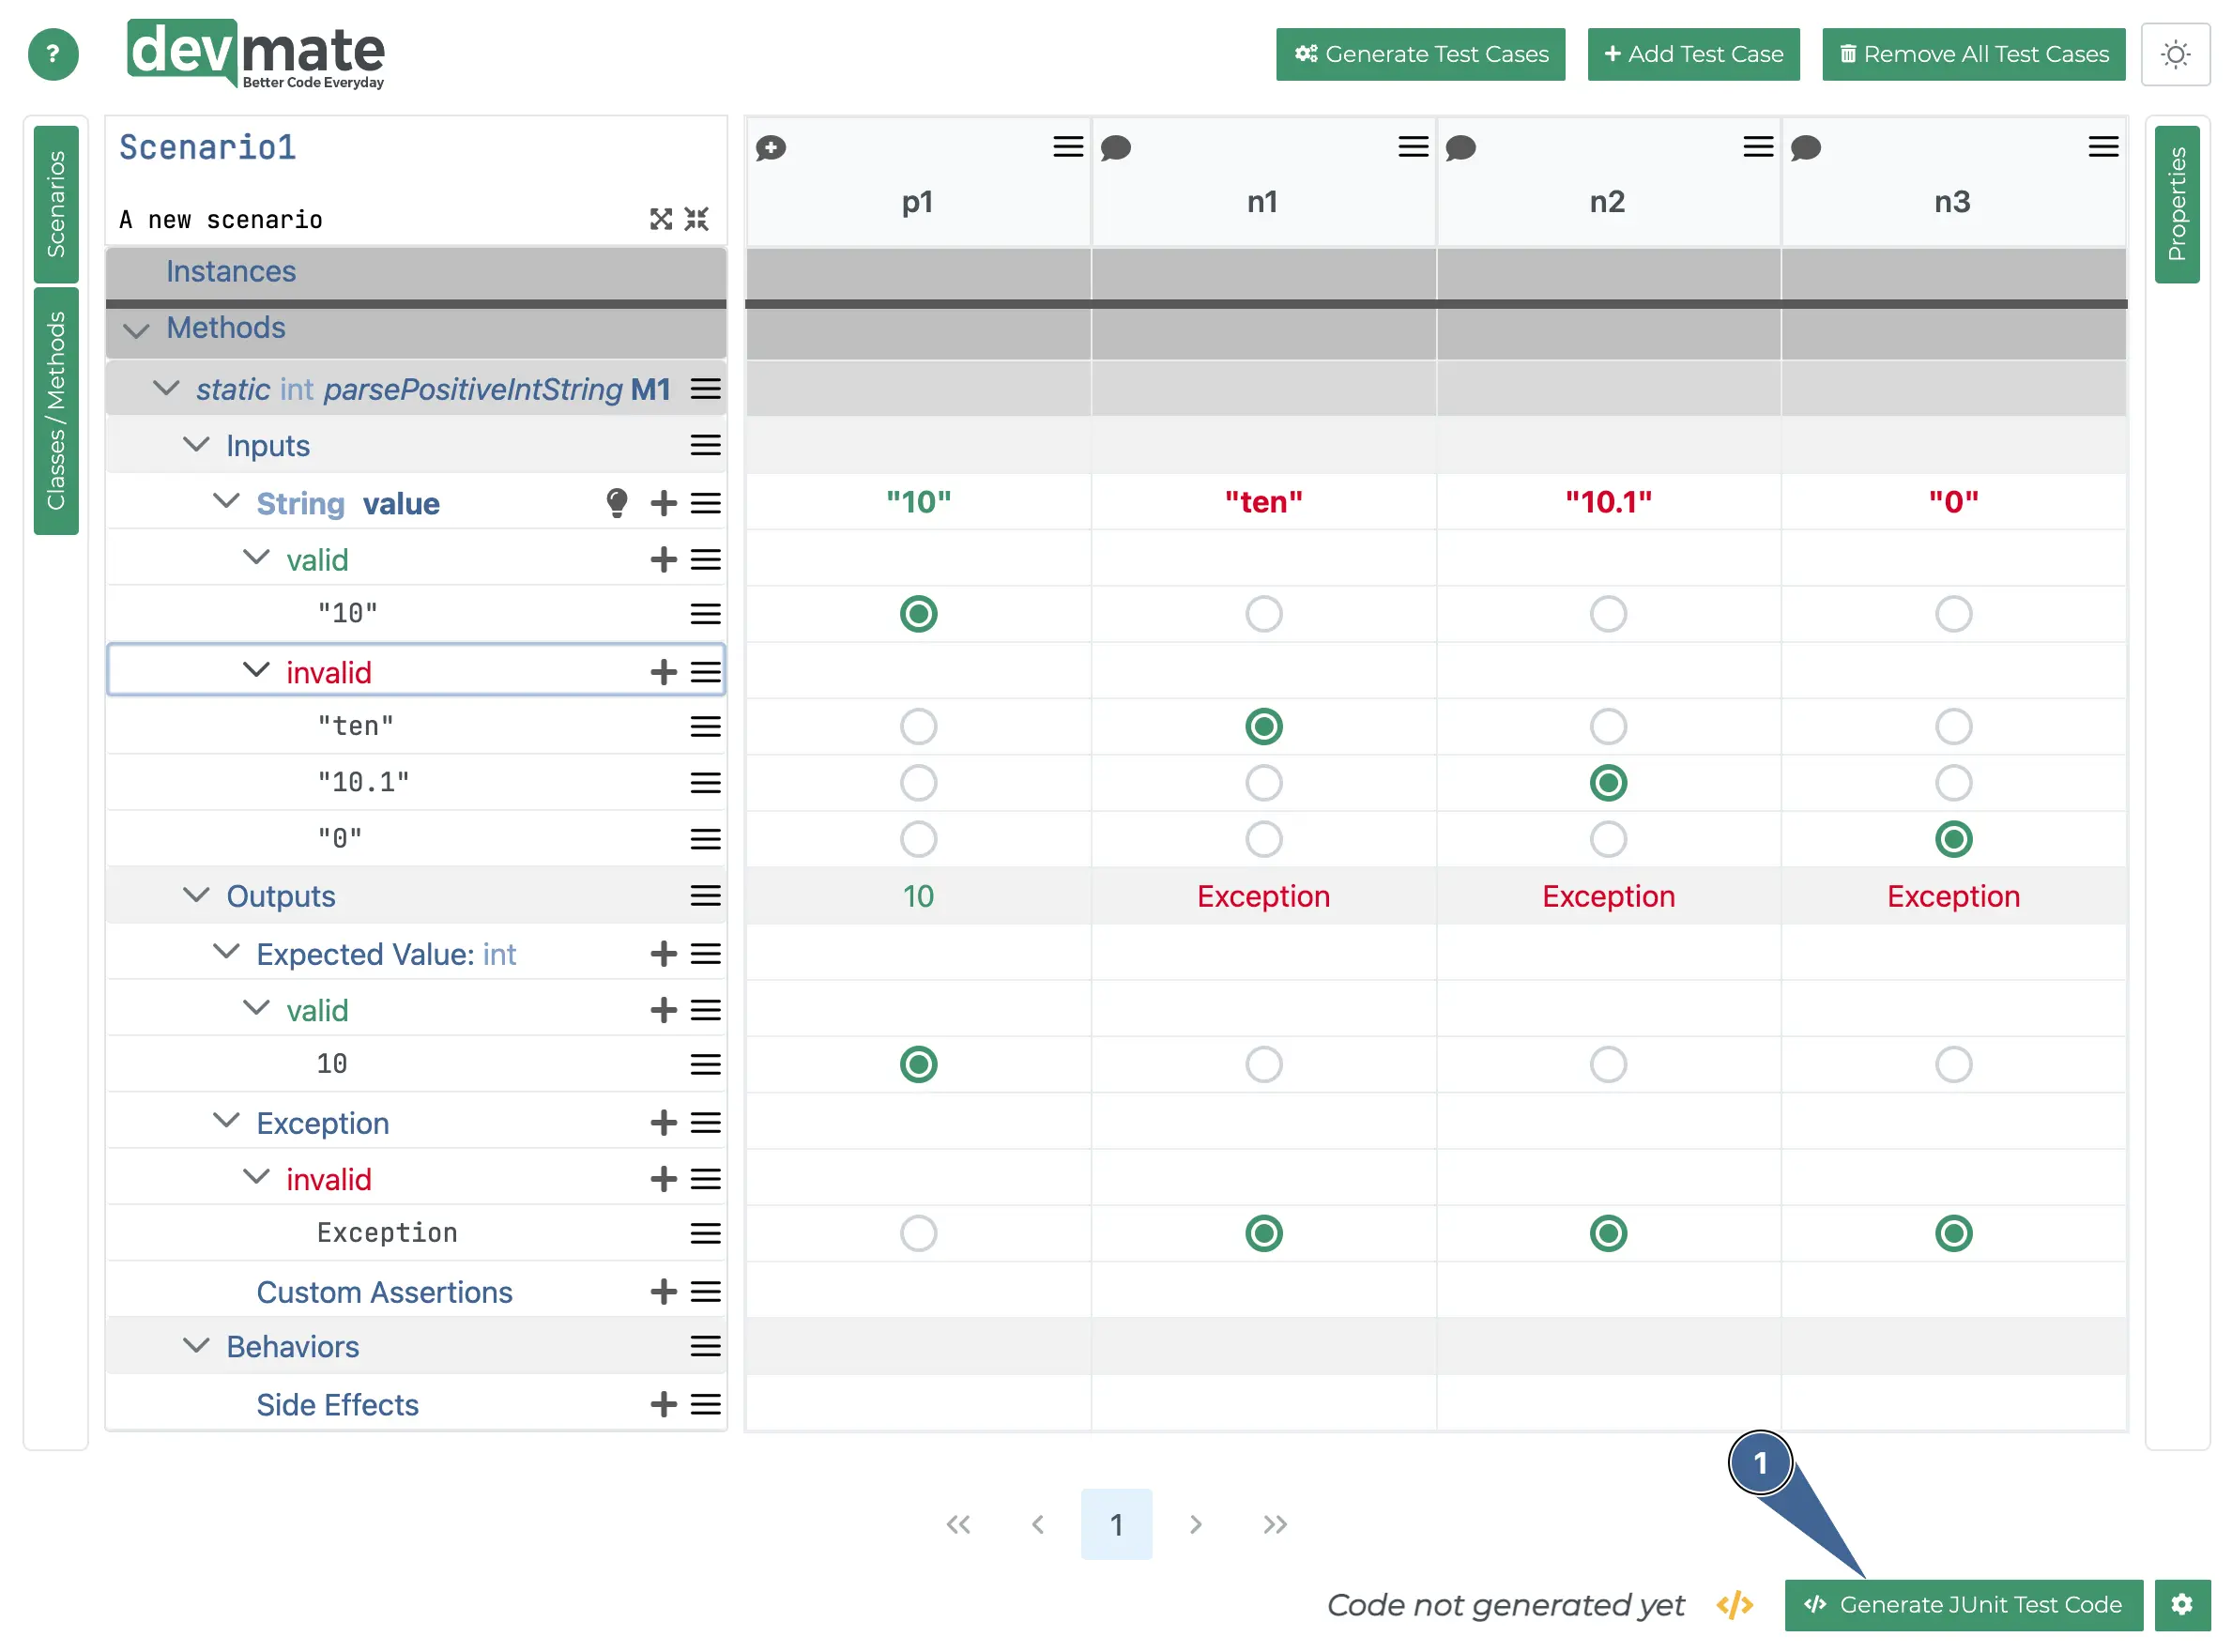
Press the Generate Test Code button and the test code is generated. Now open the generated test code.
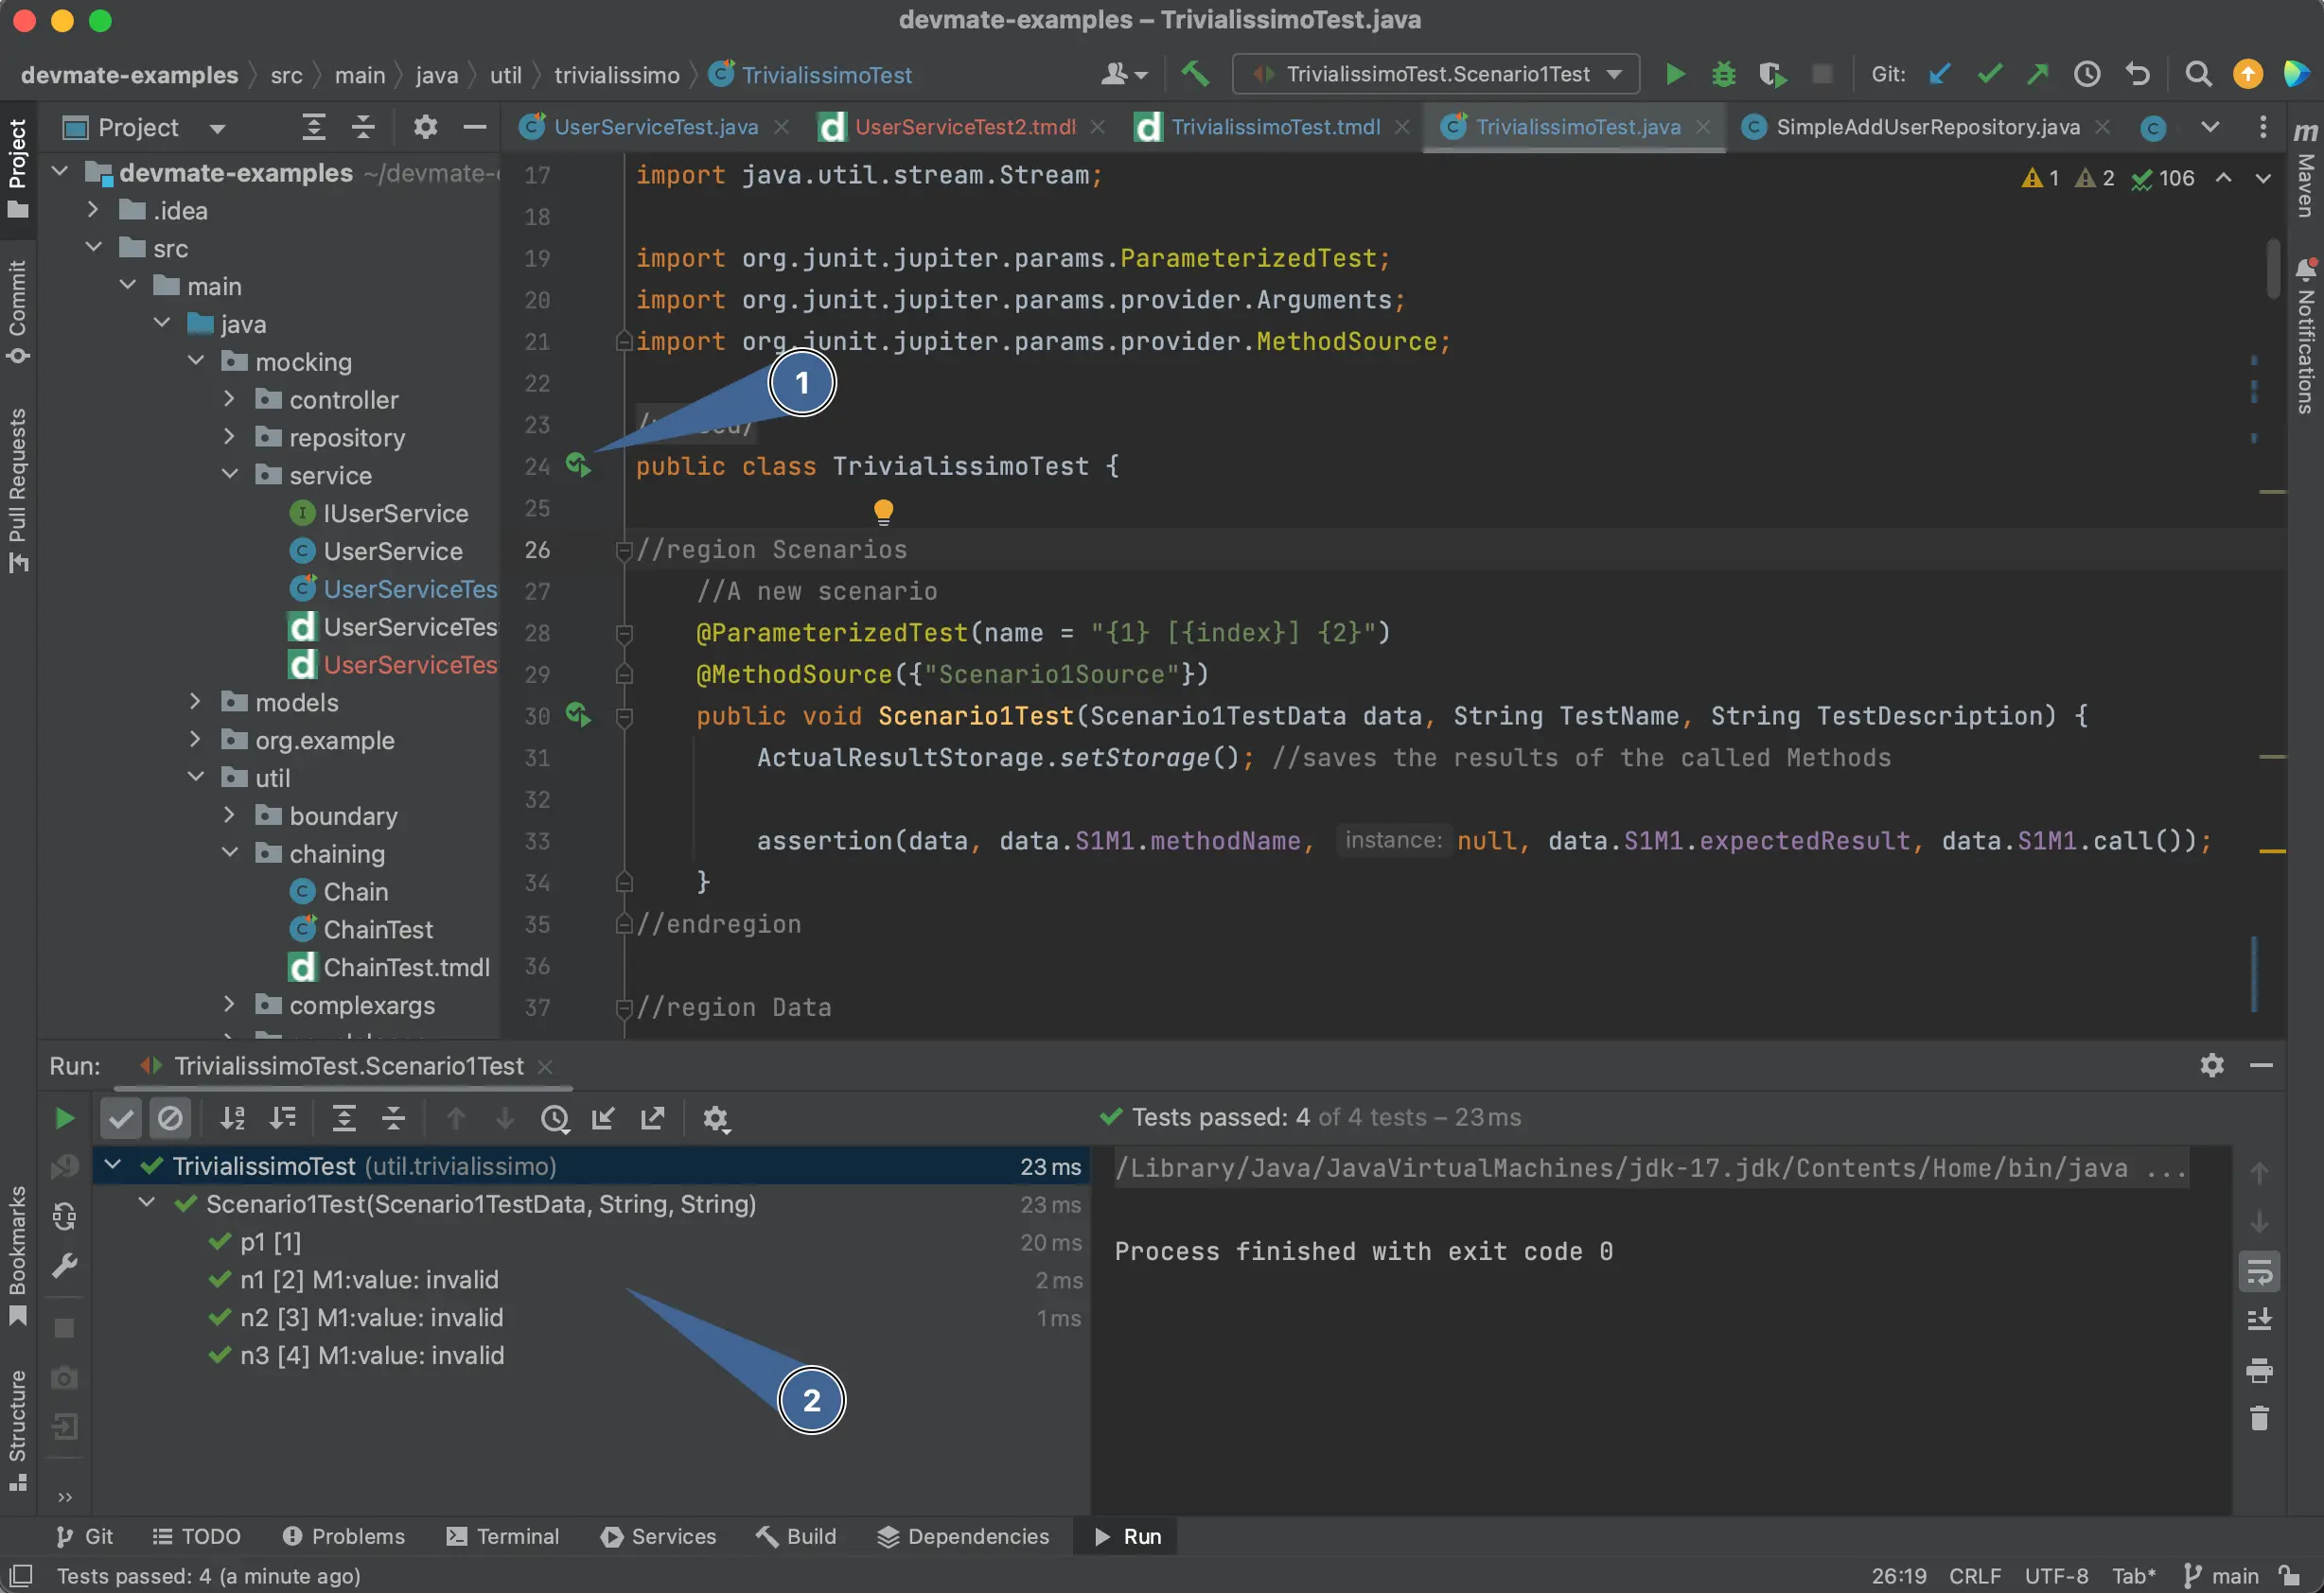
We can see our test
Trivialissimotestand you can run it as with any other manually coded unit test. Visual Studio has the same ability.We can see that the test, with its four test cases, has run and passed.
Conclusion
We’ve run through the process of testing a simple method. Some key takeaways are
It takes very little time to go from documented requirements to code.
If a developer or Product Owner, QA or Domain Expert needs to understand the basis for a test, they can do so based on DevMate's visual representation of the test.
If, in six days or six years, an issue is found, this visualisation capability will be a very major benefit to understanding how the code works without having to look at the test code itself. Troubleshooting will be far easier.
This requirements led approach is the mainstay of Test Driven Development and Black Box Testing. It’s a great way to achieve quality for the long term.