Boundary Values
If you are following along in your IDE, it will help considerably if you have looked at the earlier tutorials, especially Detailed Configuration - step by step.
Github
You can find the code relating to this tutorial on Github in the /java/util/boundary folder.
A bit about boundary analysis
Boundary values are often useful to consider when testing. The thinking behind boundary analysis is that errors can creep it at or around the boundary of a condition.
By doing this properly, we can push our test to cover all of the code logic. For example, test that conditional code in if/else or switch statements is properly executed.
It is not necessary for the person specifying the requirements to know the internal workings of the code. Writing the testing while examining the code would be White Box Testing.
Black Box Testing is, in many ways better, because the requirements can be specified by a non-developer and the developer implements a test based on those requirements. The developer subsequently writes code that meets those requirements and only those requirements.
As a result, the developer spends less time writing the test and is less likely to write unnecessary code.
Requirements
Let’s take the case of an insurance company.
We do not insure anyone under the age of 18 and over the age of 25.
So, reject anyone aged 17 and below as well as 26 year old and above.
Test Definition
We’ll create follow TDD principles and design the test before we write any functional code. You could as write the code first, though, if you’re taking the Code First approach.
Thinking about the boundaries
As we said at the top of the page, the thinking behind boundary is that errors can creep in at or around boundary values. In this very simple example, we are dealing with two values - 18 and 25.
To test values at and around the boundaries, we might test 17, 18 and 18 as well as 24, 25, 26. In tabular form, this looks like this.
Requirement | Type | Input | Expected Output |
|---|---|---|---|
| Valid |
|
|
| Valid Boundary |
|
|
| Invalid Boundary |
|
|
| Invalid |
|
|
The method
As the developer and having looked at the requirements, let’s agree that the method under test should return a boolean.
We’ll start with an empty method as a starting point, so we can jump into DevMate using TDD.
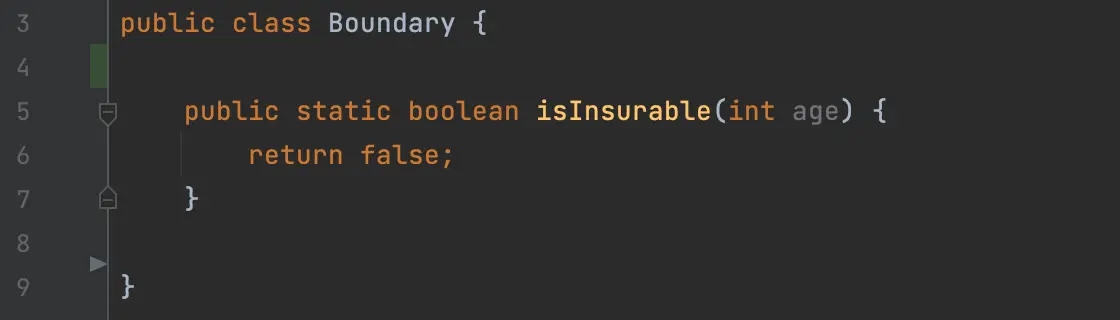
Right-click on the
isInsurable()method name and create a DevMate test.
DevMate inputs and outputs
We should now define some valid ages to test as well as invalid ones that throw an exception. We will also test the boundary conditions.
In the screenshot below, you can see that we’ve defined the Equivalence Classes and already pressed the Generate Test Code button. See Detailed Configuration - step by step if you haven’t learned how to define equivalence classes.
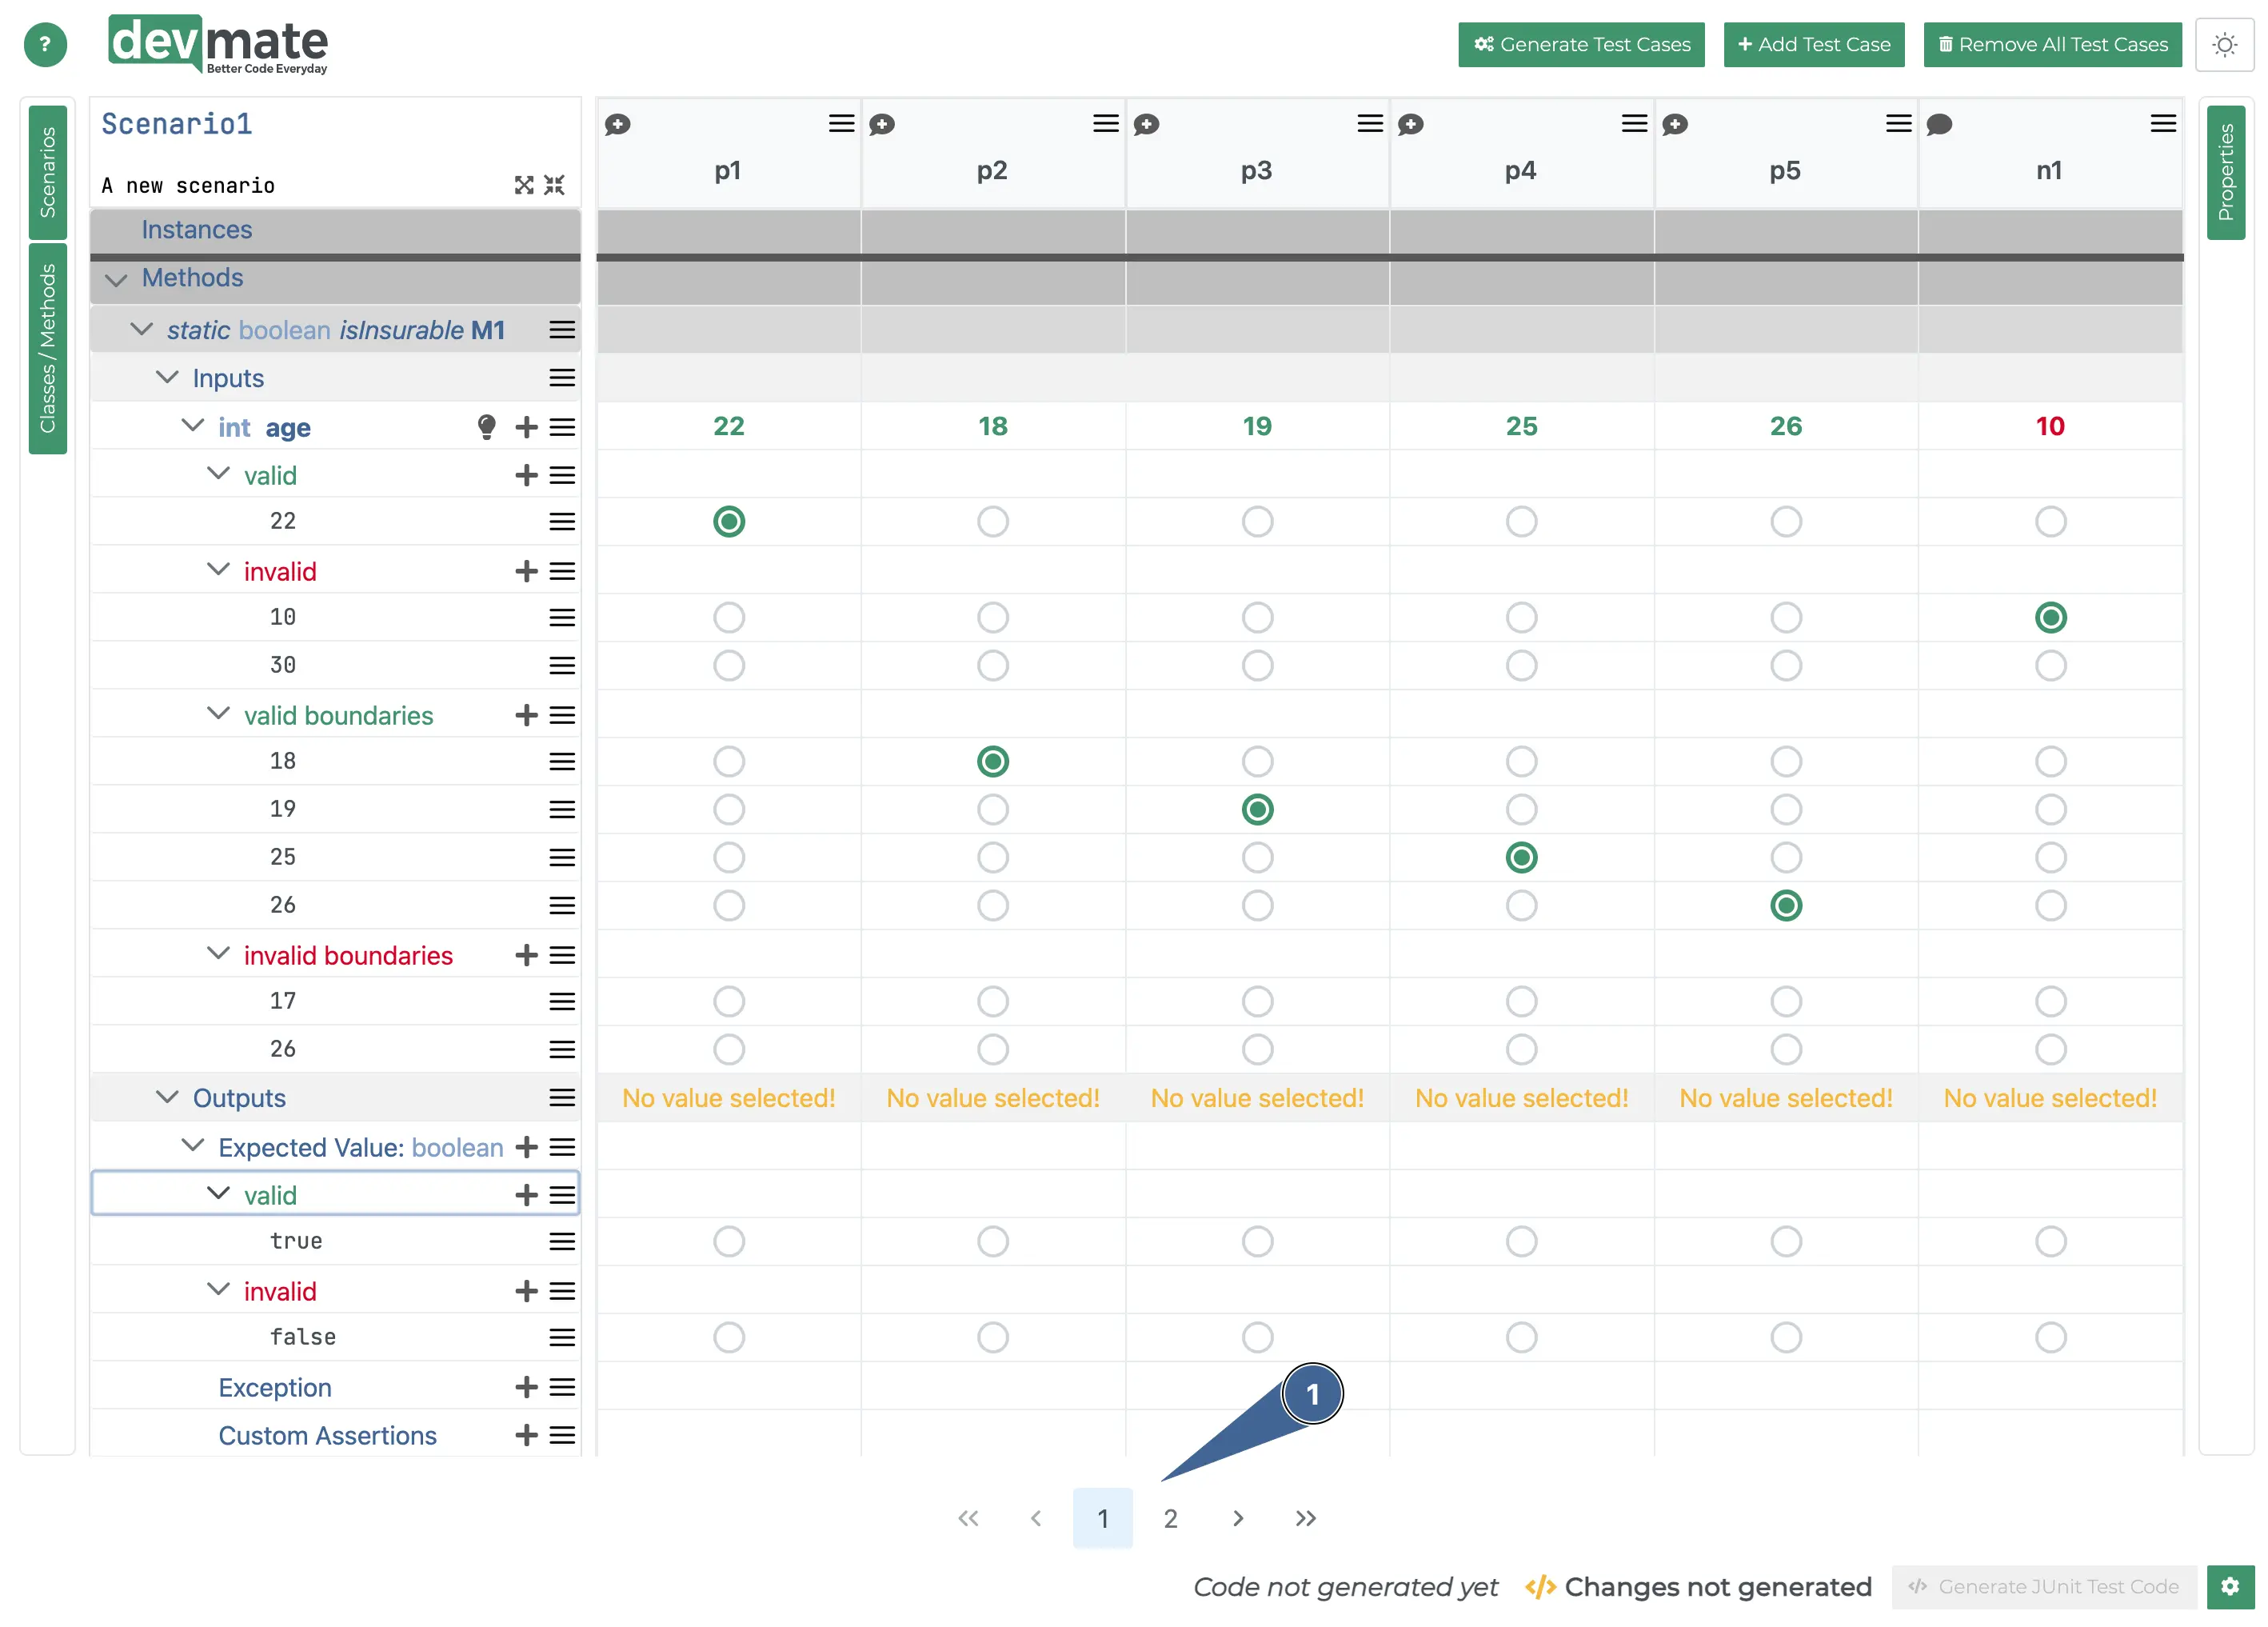
Please note that there are now two pages of test cases generated. We will need to complete the outputs for all of the test cases in order to generate the test code.
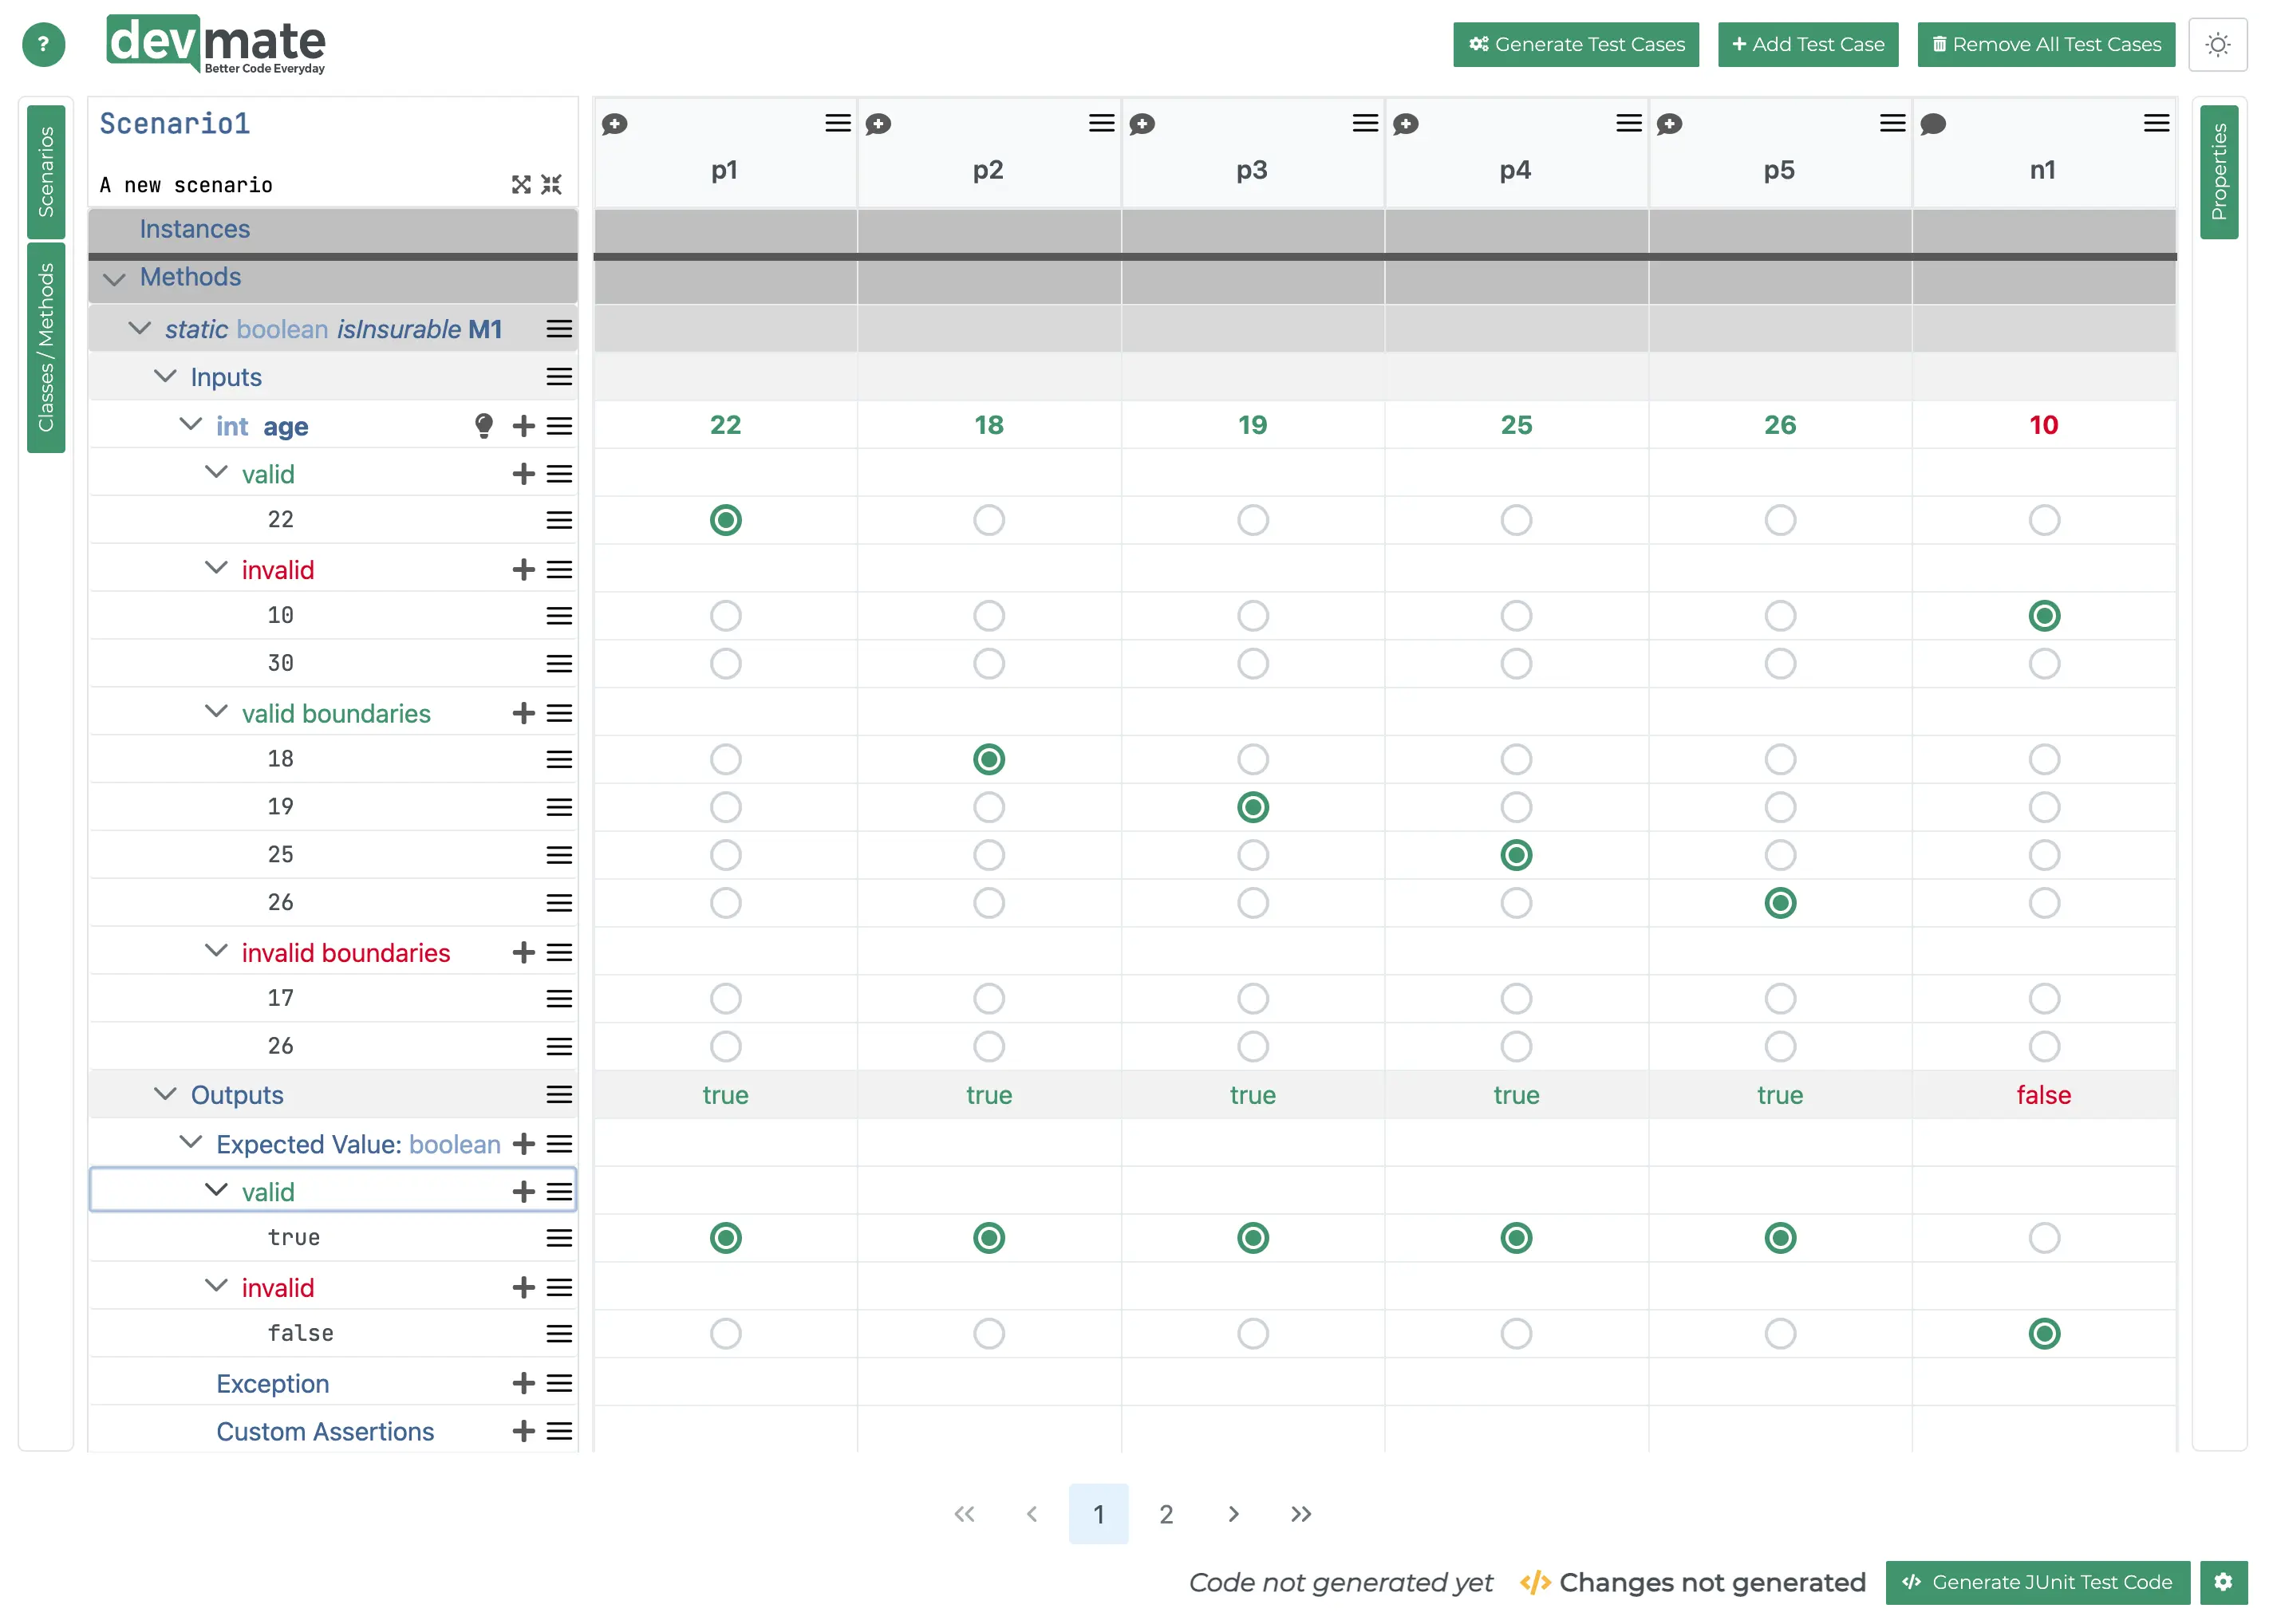
Matching test case outputs
This step is quick and easy, despite having two pages of test cases.
The labels p1 ... pn indicate positive test cases. So we can select the valid output (true) for all of these as our method under test is a boolean.
Similarly, n1 ... nn are all negative test cases, so are expected to return false.
Now, our dialog looks like this and the Generate Test Code button in the bottom right is enabled and ready to press. If the Generate Test Code button is disabled, you have forgotten to complete one or more of the generated test cases.
Generating test code and run test
Press the Generate Test Code button (bottom right) and save the test. Usually, the same folder as the class containing the method is the best location.
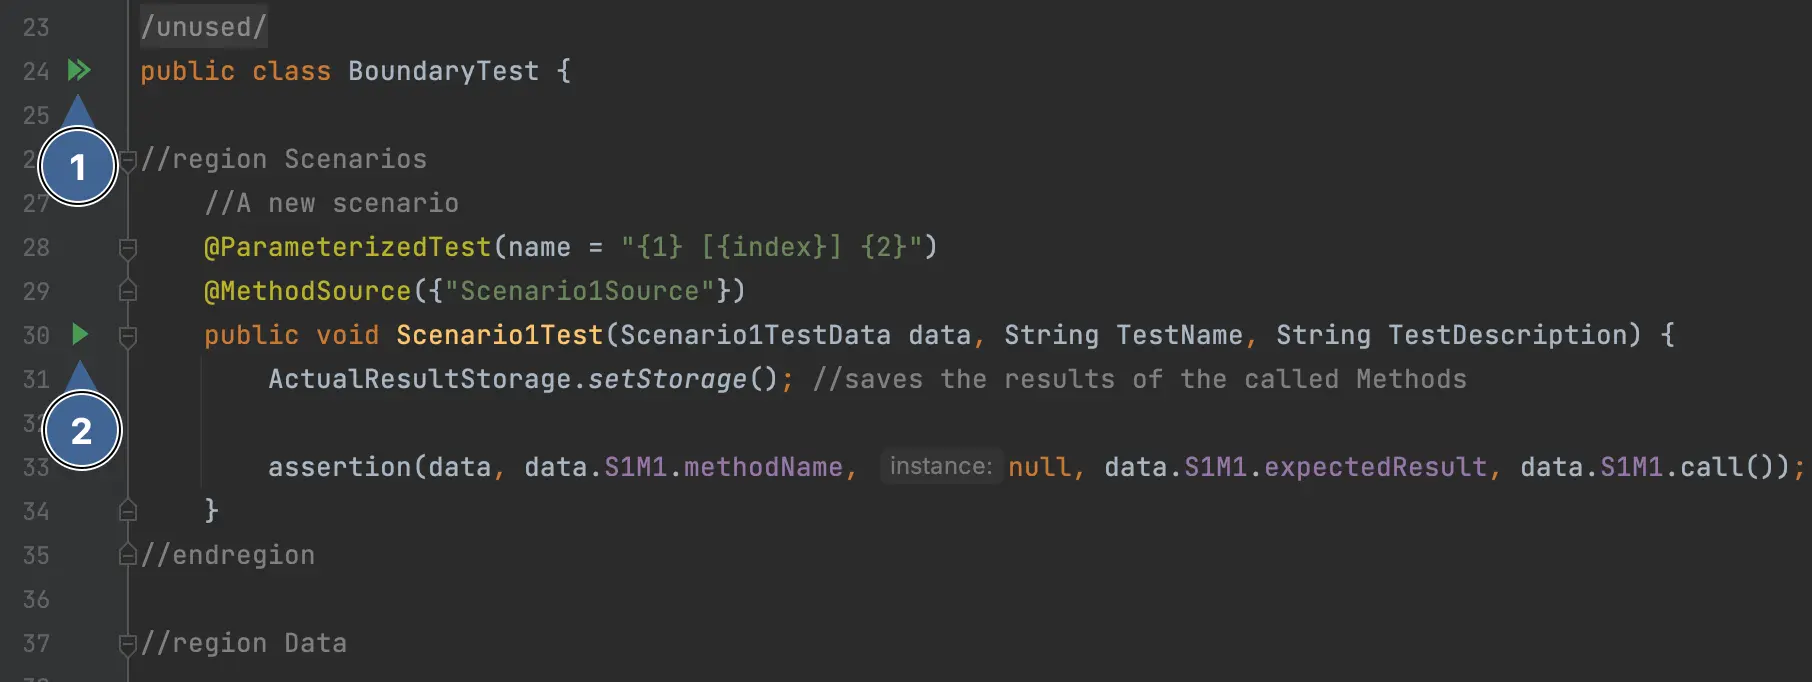
Open the generated test file in your IDE.
In IntelliJ, you should see something like this with the familiar green arrow to run your test.
Run all tests in the class.
Run just this test.
Run the test and you should see the following.
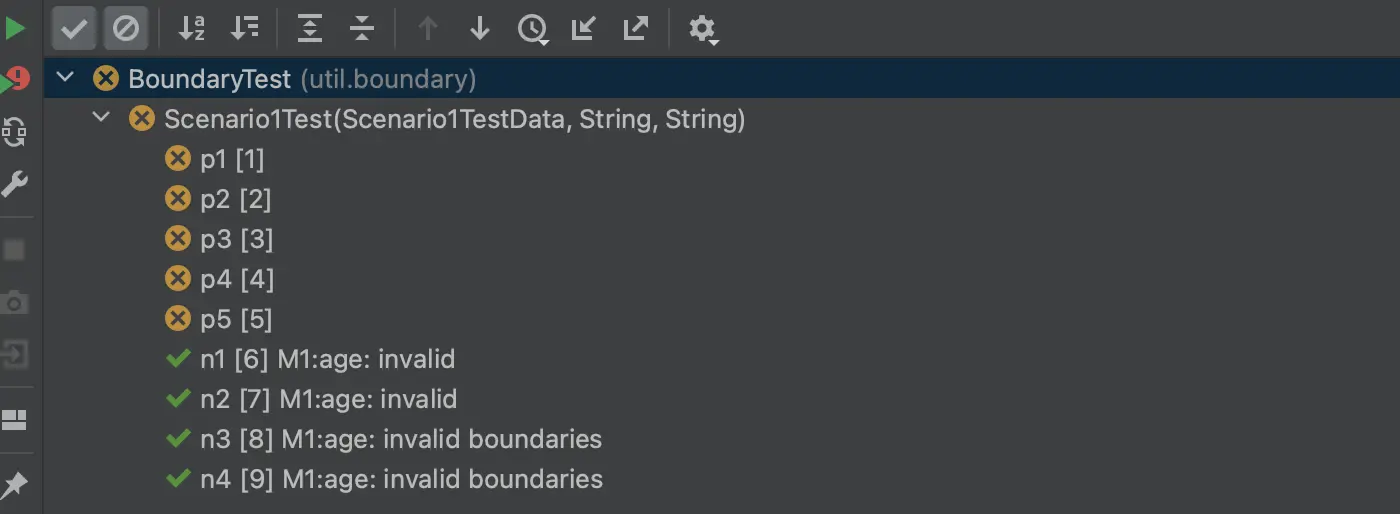
Are you can see, the test has failed for the valid cases p1 to p5. This is what we would expect, given that we have not yet implemented the logic. Let’s do this now.
Refactoring the method
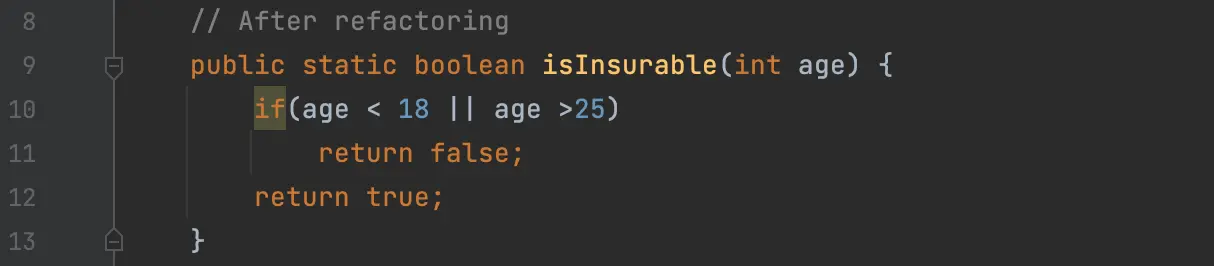
Let’s implement the logic in our isInsurable() method and run the test again.
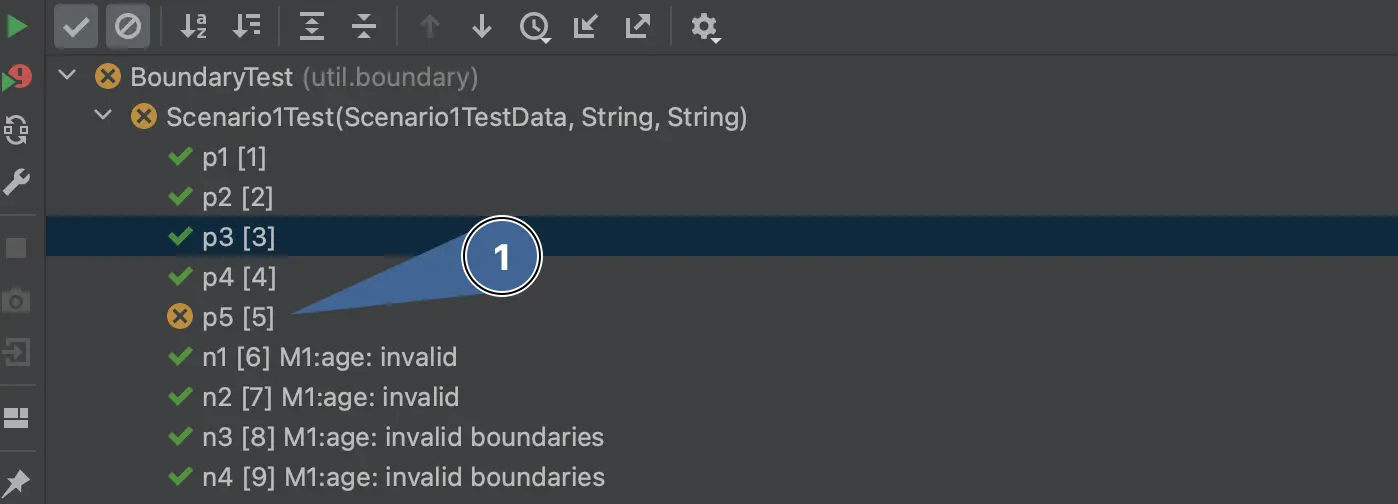
This is better, but we still have one problem. The test case p5 has failed.
Refactor the test case
If we look at the DevMate configuration, it’s clear that we made a mistake defining this case. If you look at the p5 column, we defined the output corresponding to the input of 26 as true. It should be false.
We should
In the test case column
p5, click oninvalid->falseradio button in the output rowPress the “Generate Test Code” button to update the test
Re-run the test
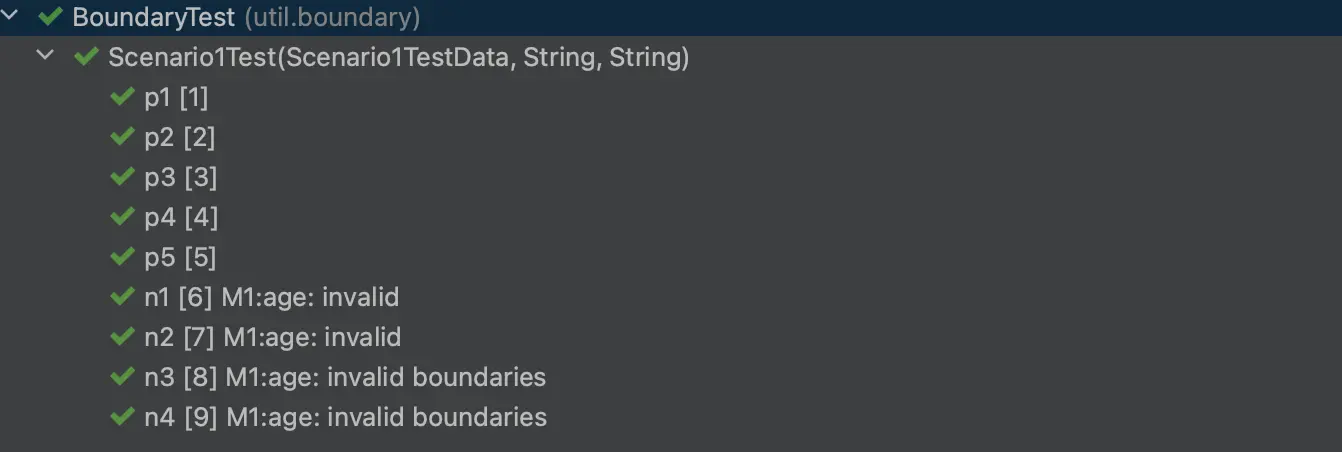
That’s better!
Conclusion
Configuring this test takes two to three minutes for an experienced DevMate user.
Boundary value conditions are clearly visualized based on the requirements and manifested in the DevMate dialog.
The requirements are easy to read for everyone, not just the developer.