Custom Assertions
Custom Assertions let you write code to determine the outcome of the test case. You might want to write one if the standard approaches available in the Expected Value Output doesn’t fit the bill or if you simply want full control.
Github
You can find the code relating to this tutorial on Github in the /java/util/complexargs folder.
Before we start
If you’ve run the previous tutorial in your IDE it should look like this.
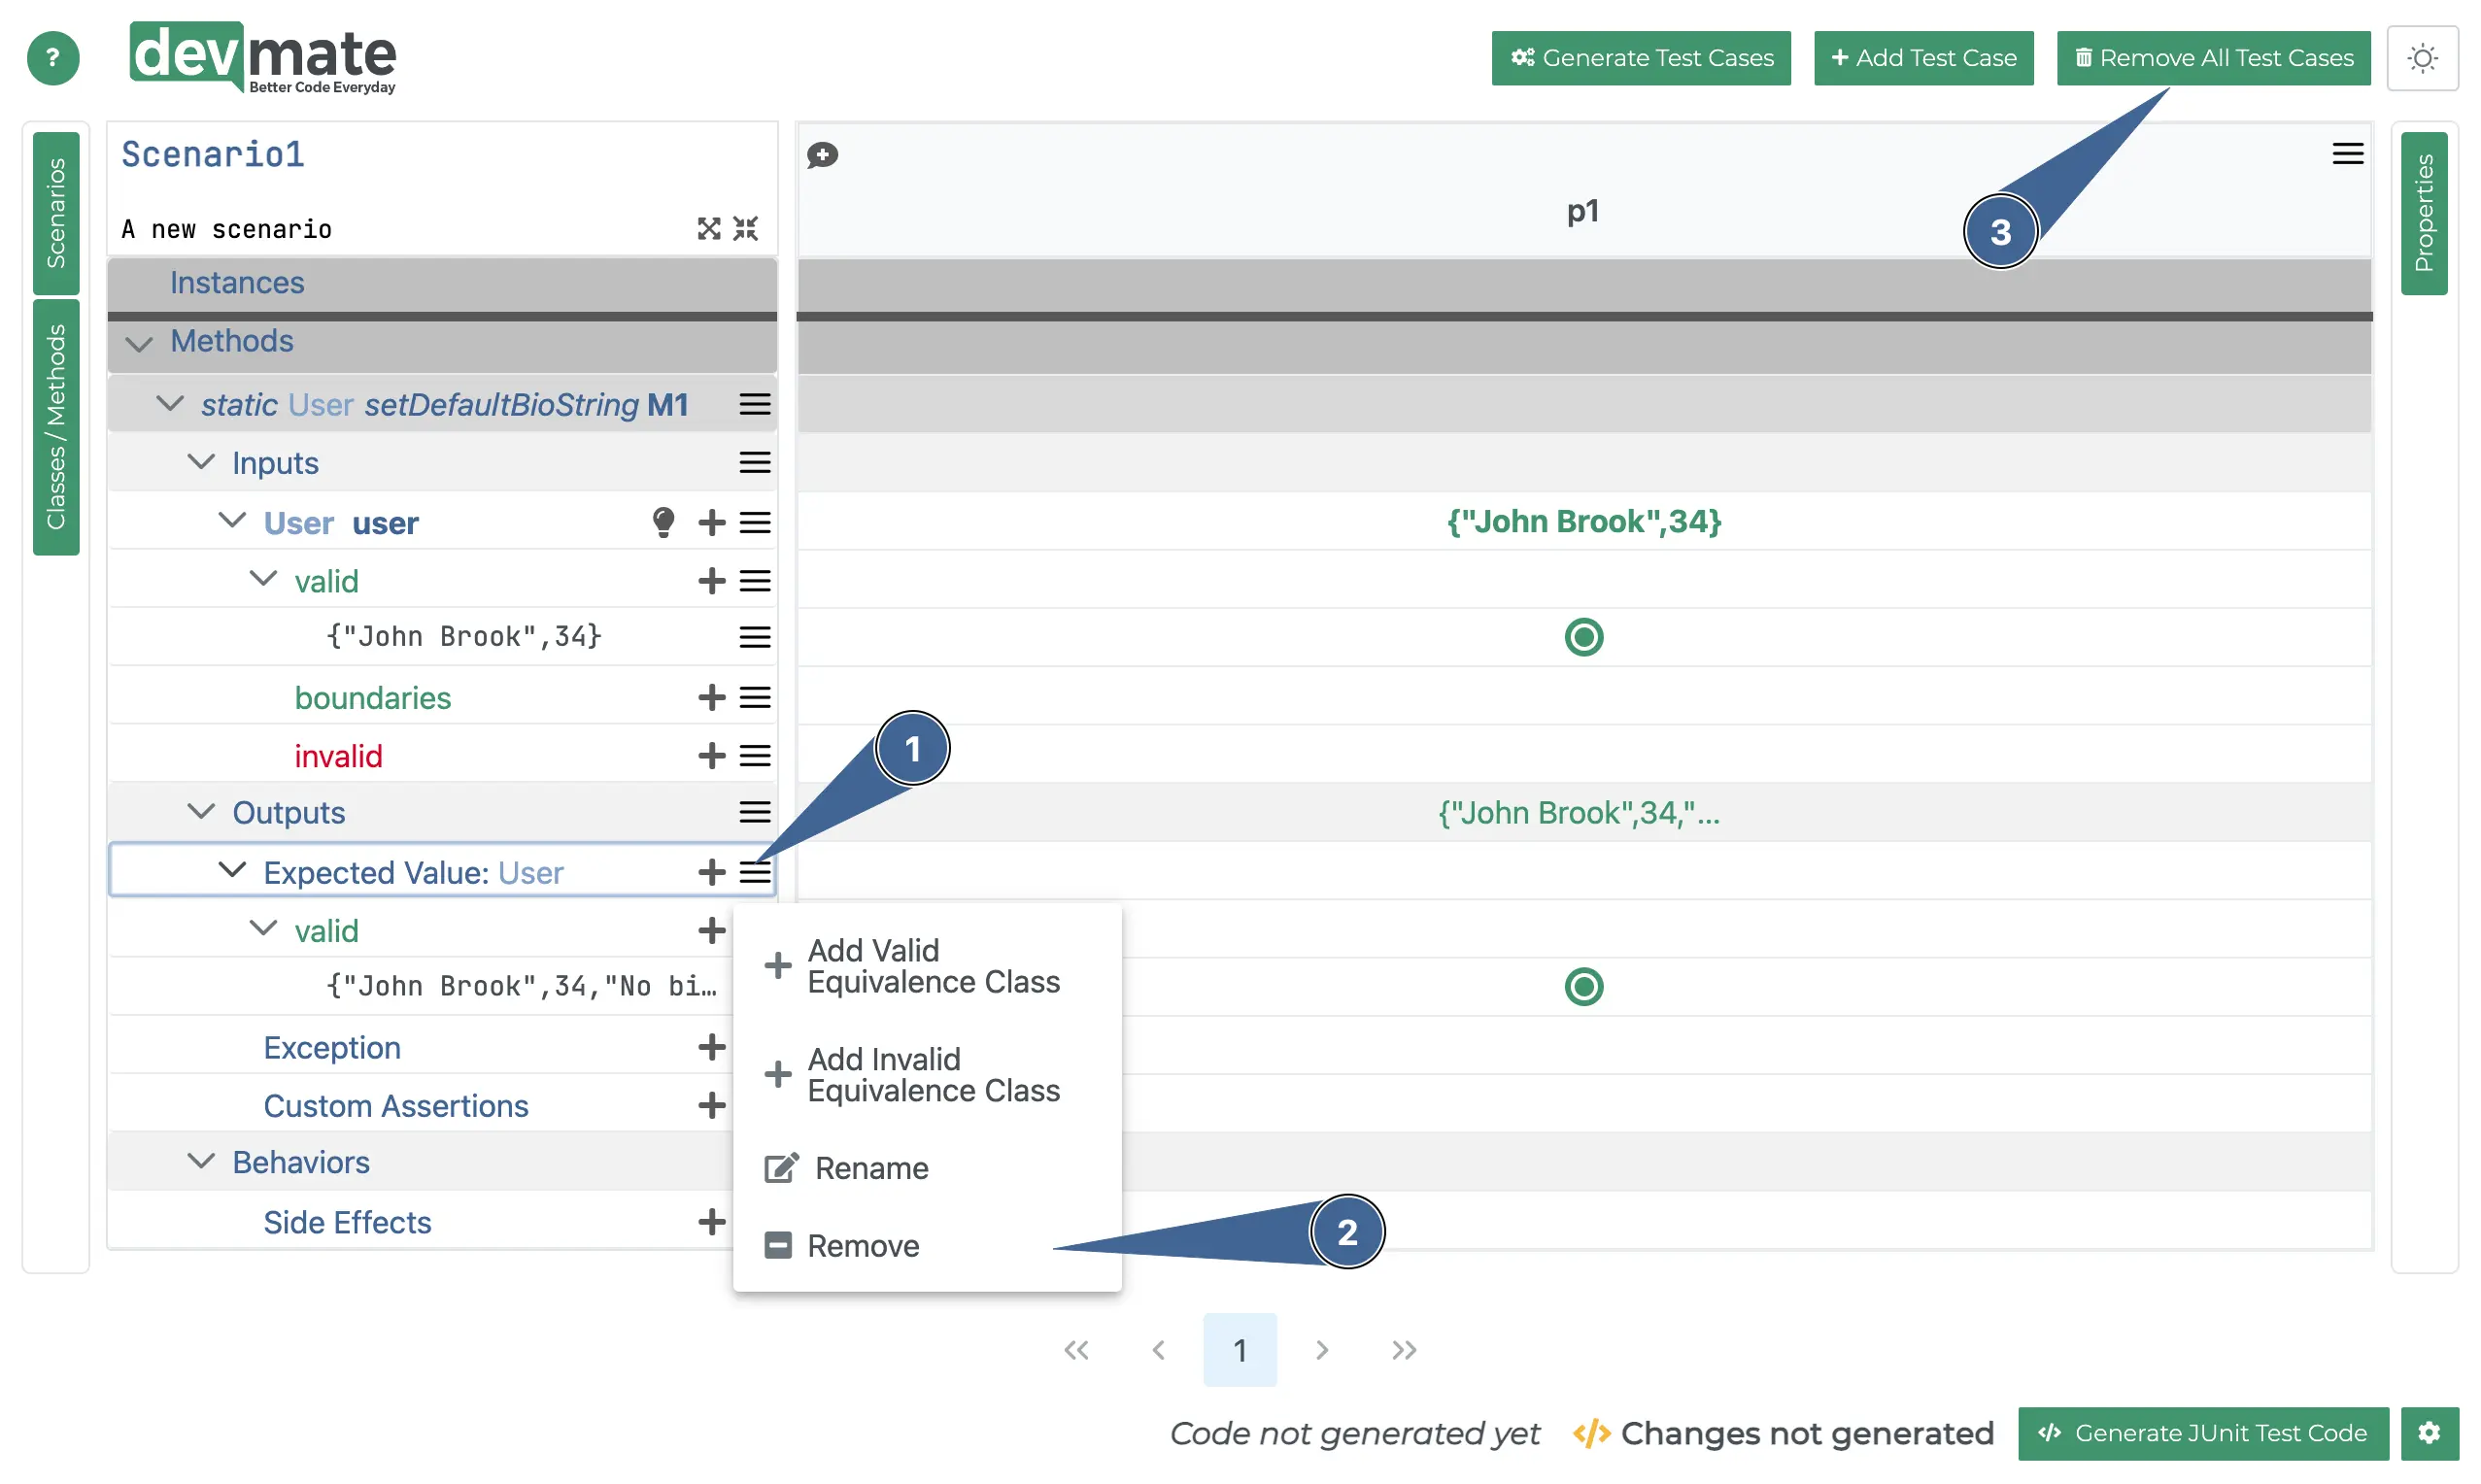
If this is the case, reset everything it as follows.
Click on the hamburger icon.
Press Remove.
Press Remove All Test Cases.
Adding a Custom Assertion - first way
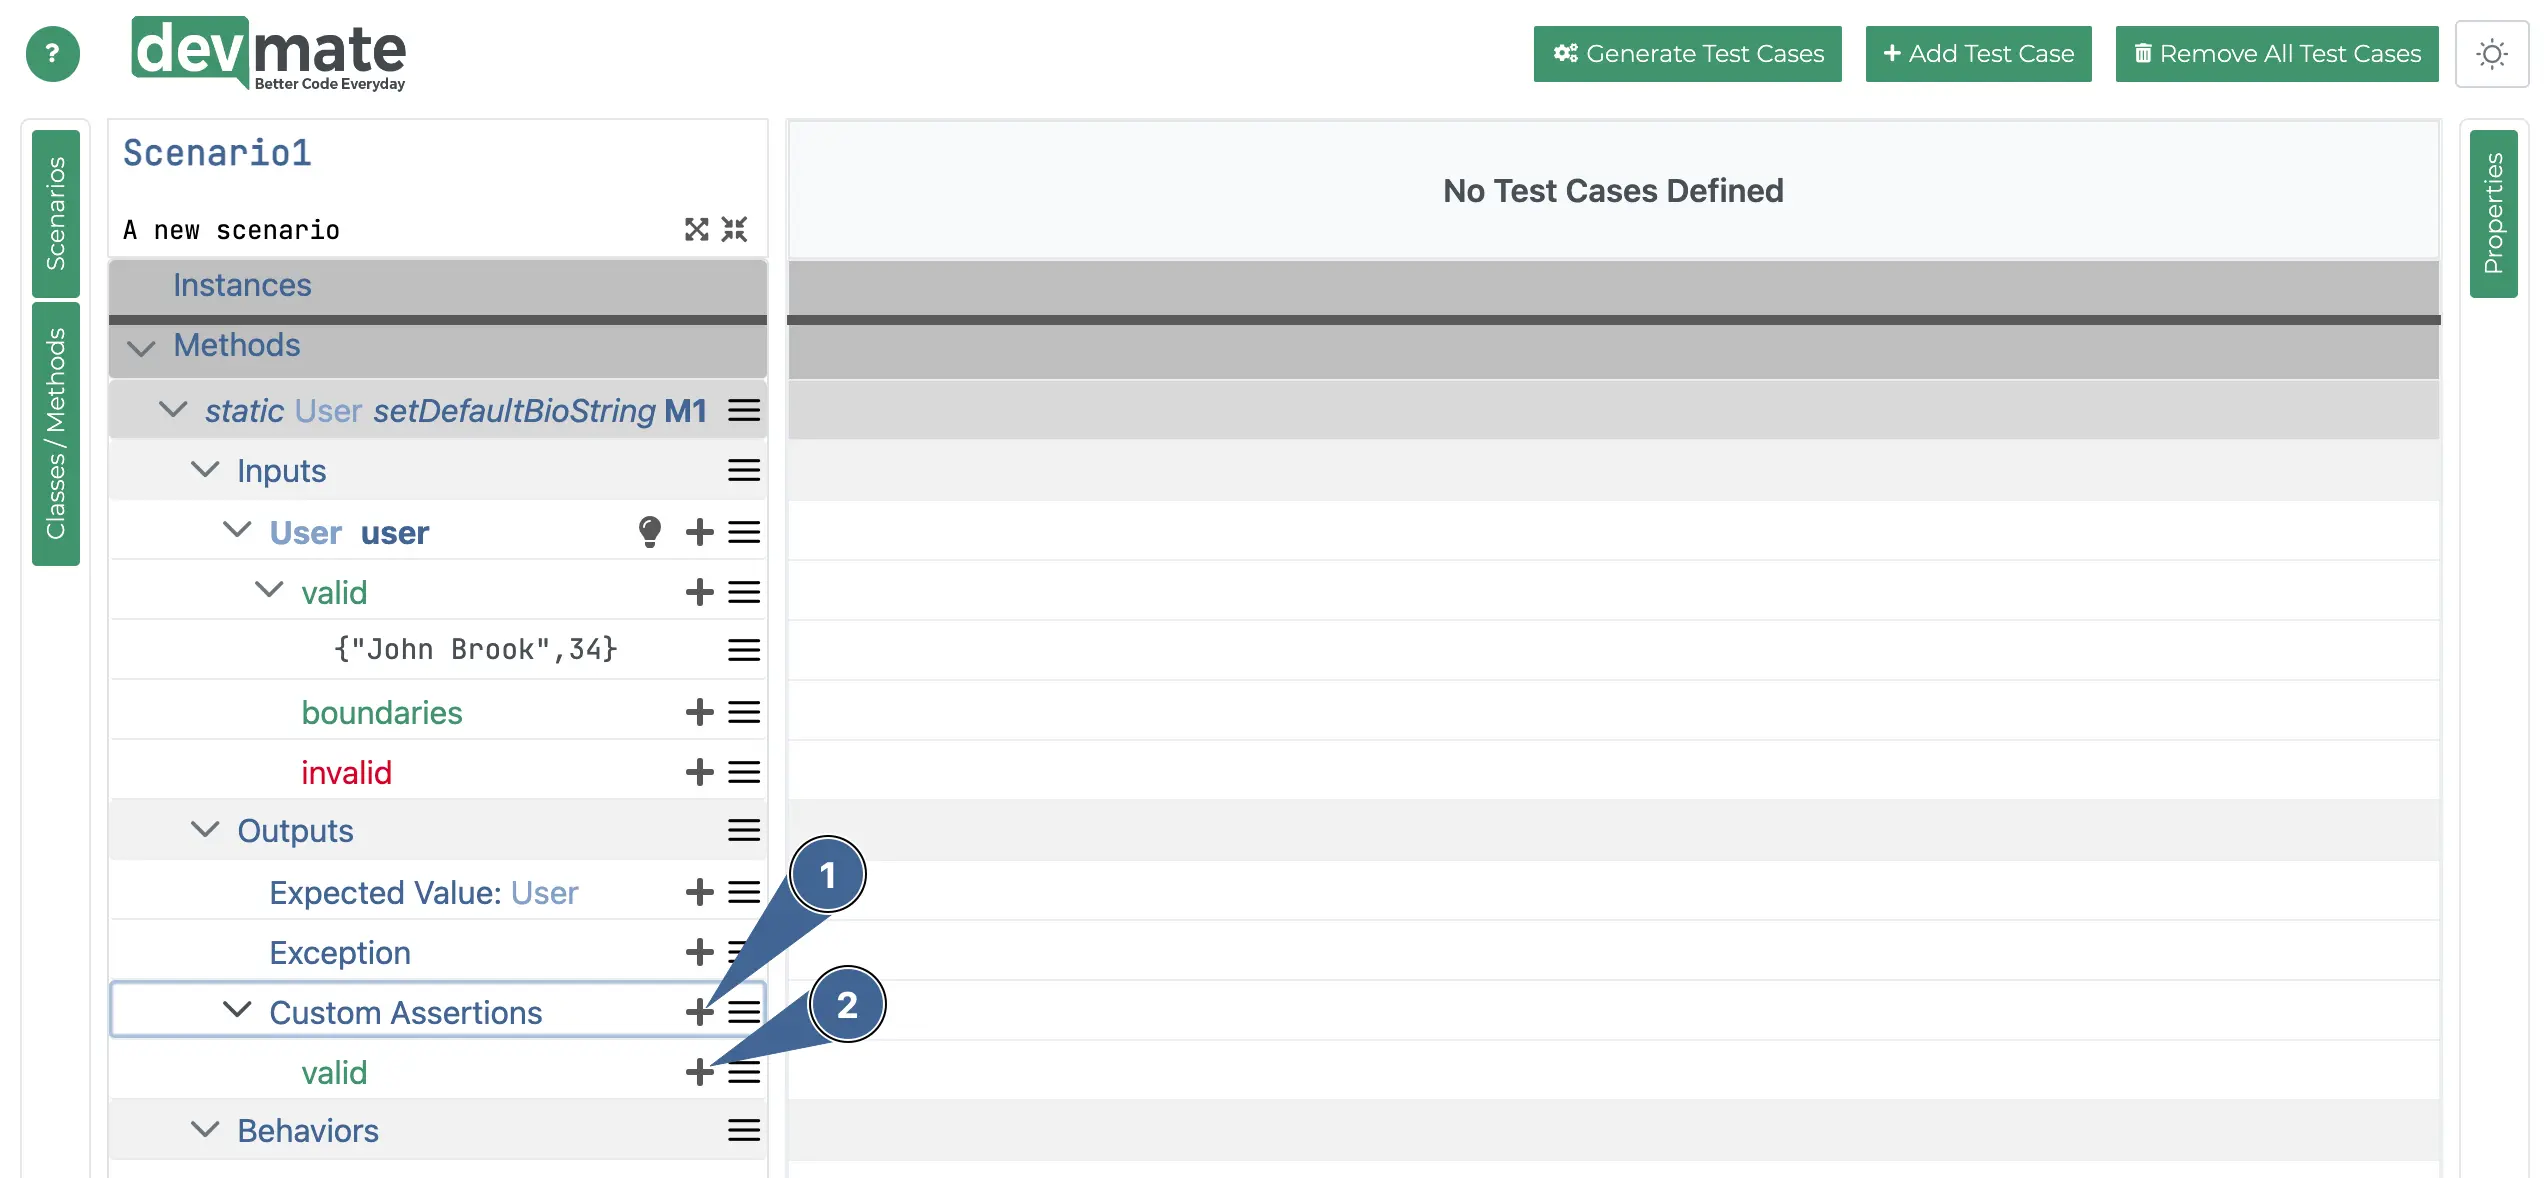
Click the + icon to add a new custom assertion.
Click the + icon next to valid.

Click in the dropdown and select Add New Custom Assertion Factory.

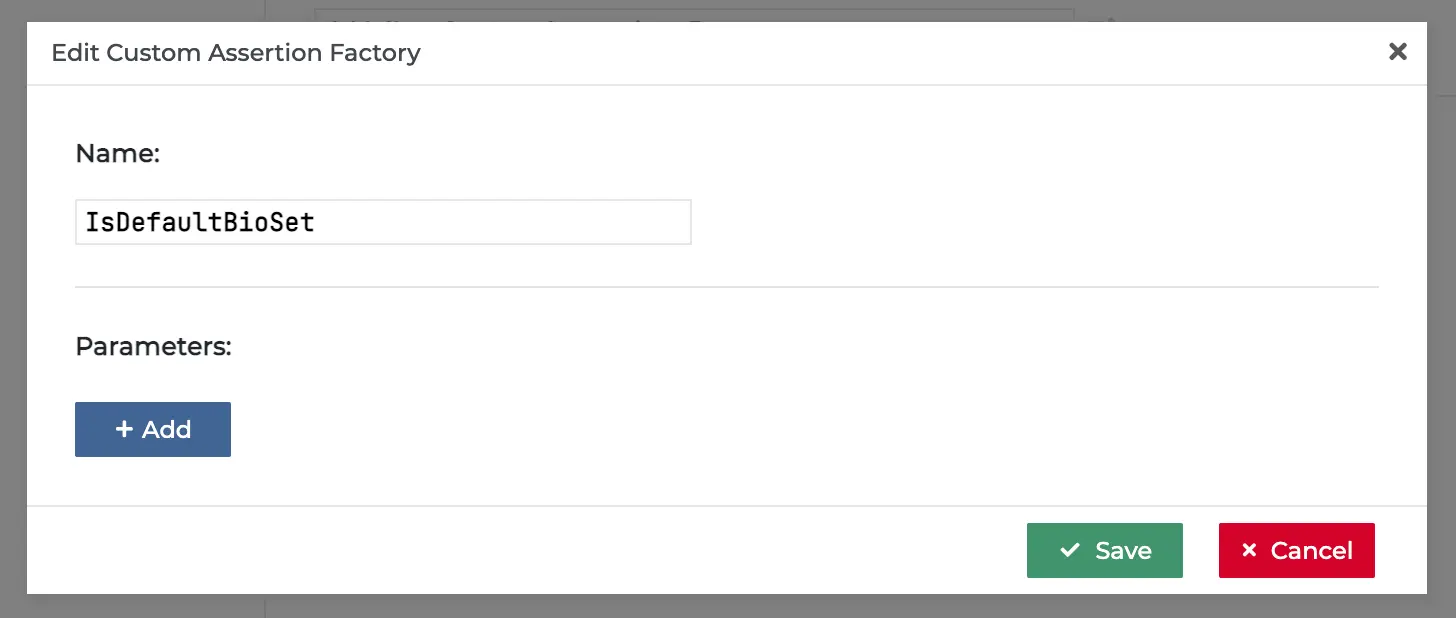
In the popup, enter the name of the factory method, for example
IsDefaultBioSetthen press Save.Press Save again to return the main screen.
You will now see the following screen.
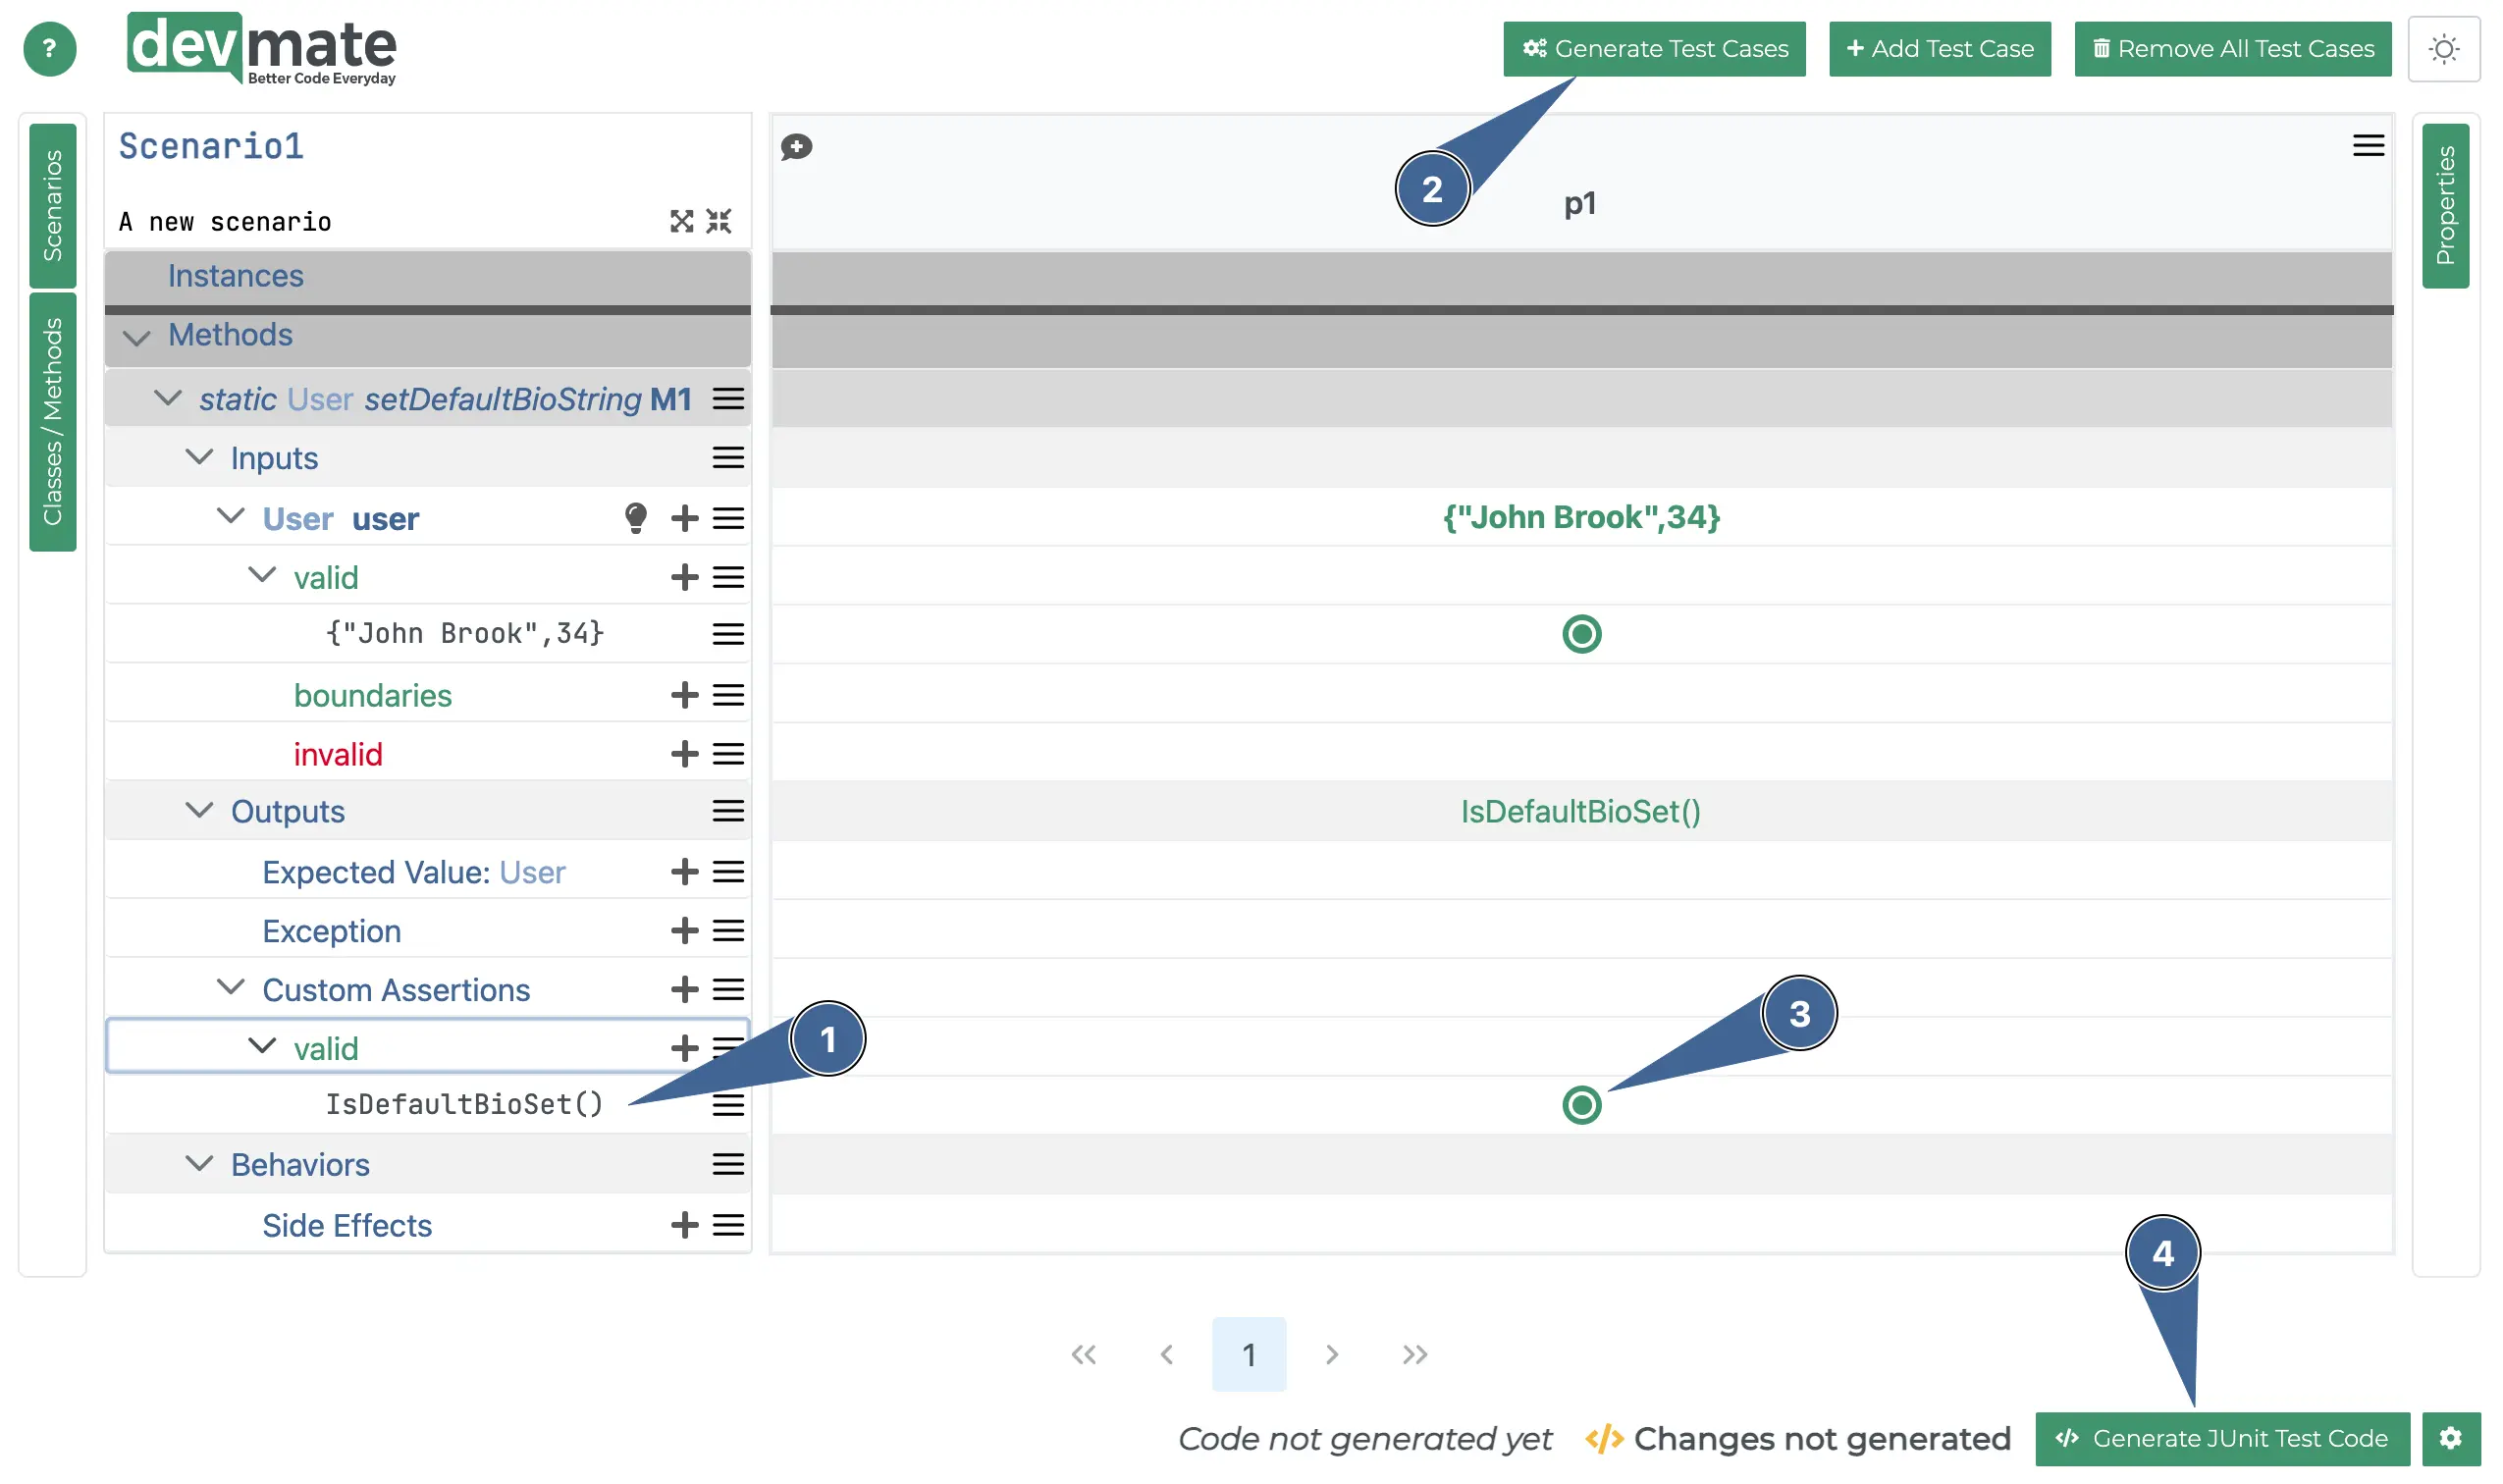
You can see the newly added custom assertion factory successfully added.
Press the Generate Test Cases button. This is a really simple use case so there will only be one. Afterwards, the test cases will appear as shown above.
Click on this radio button, which will initially be empty.
The Generate Test Code button will now be enabled. Press it, save the file and open it.
Editing the Custom Assertion Factory Method code
Below, you can see the generated code (In IntelliJ, but other IDEs / C# are the same in principle).
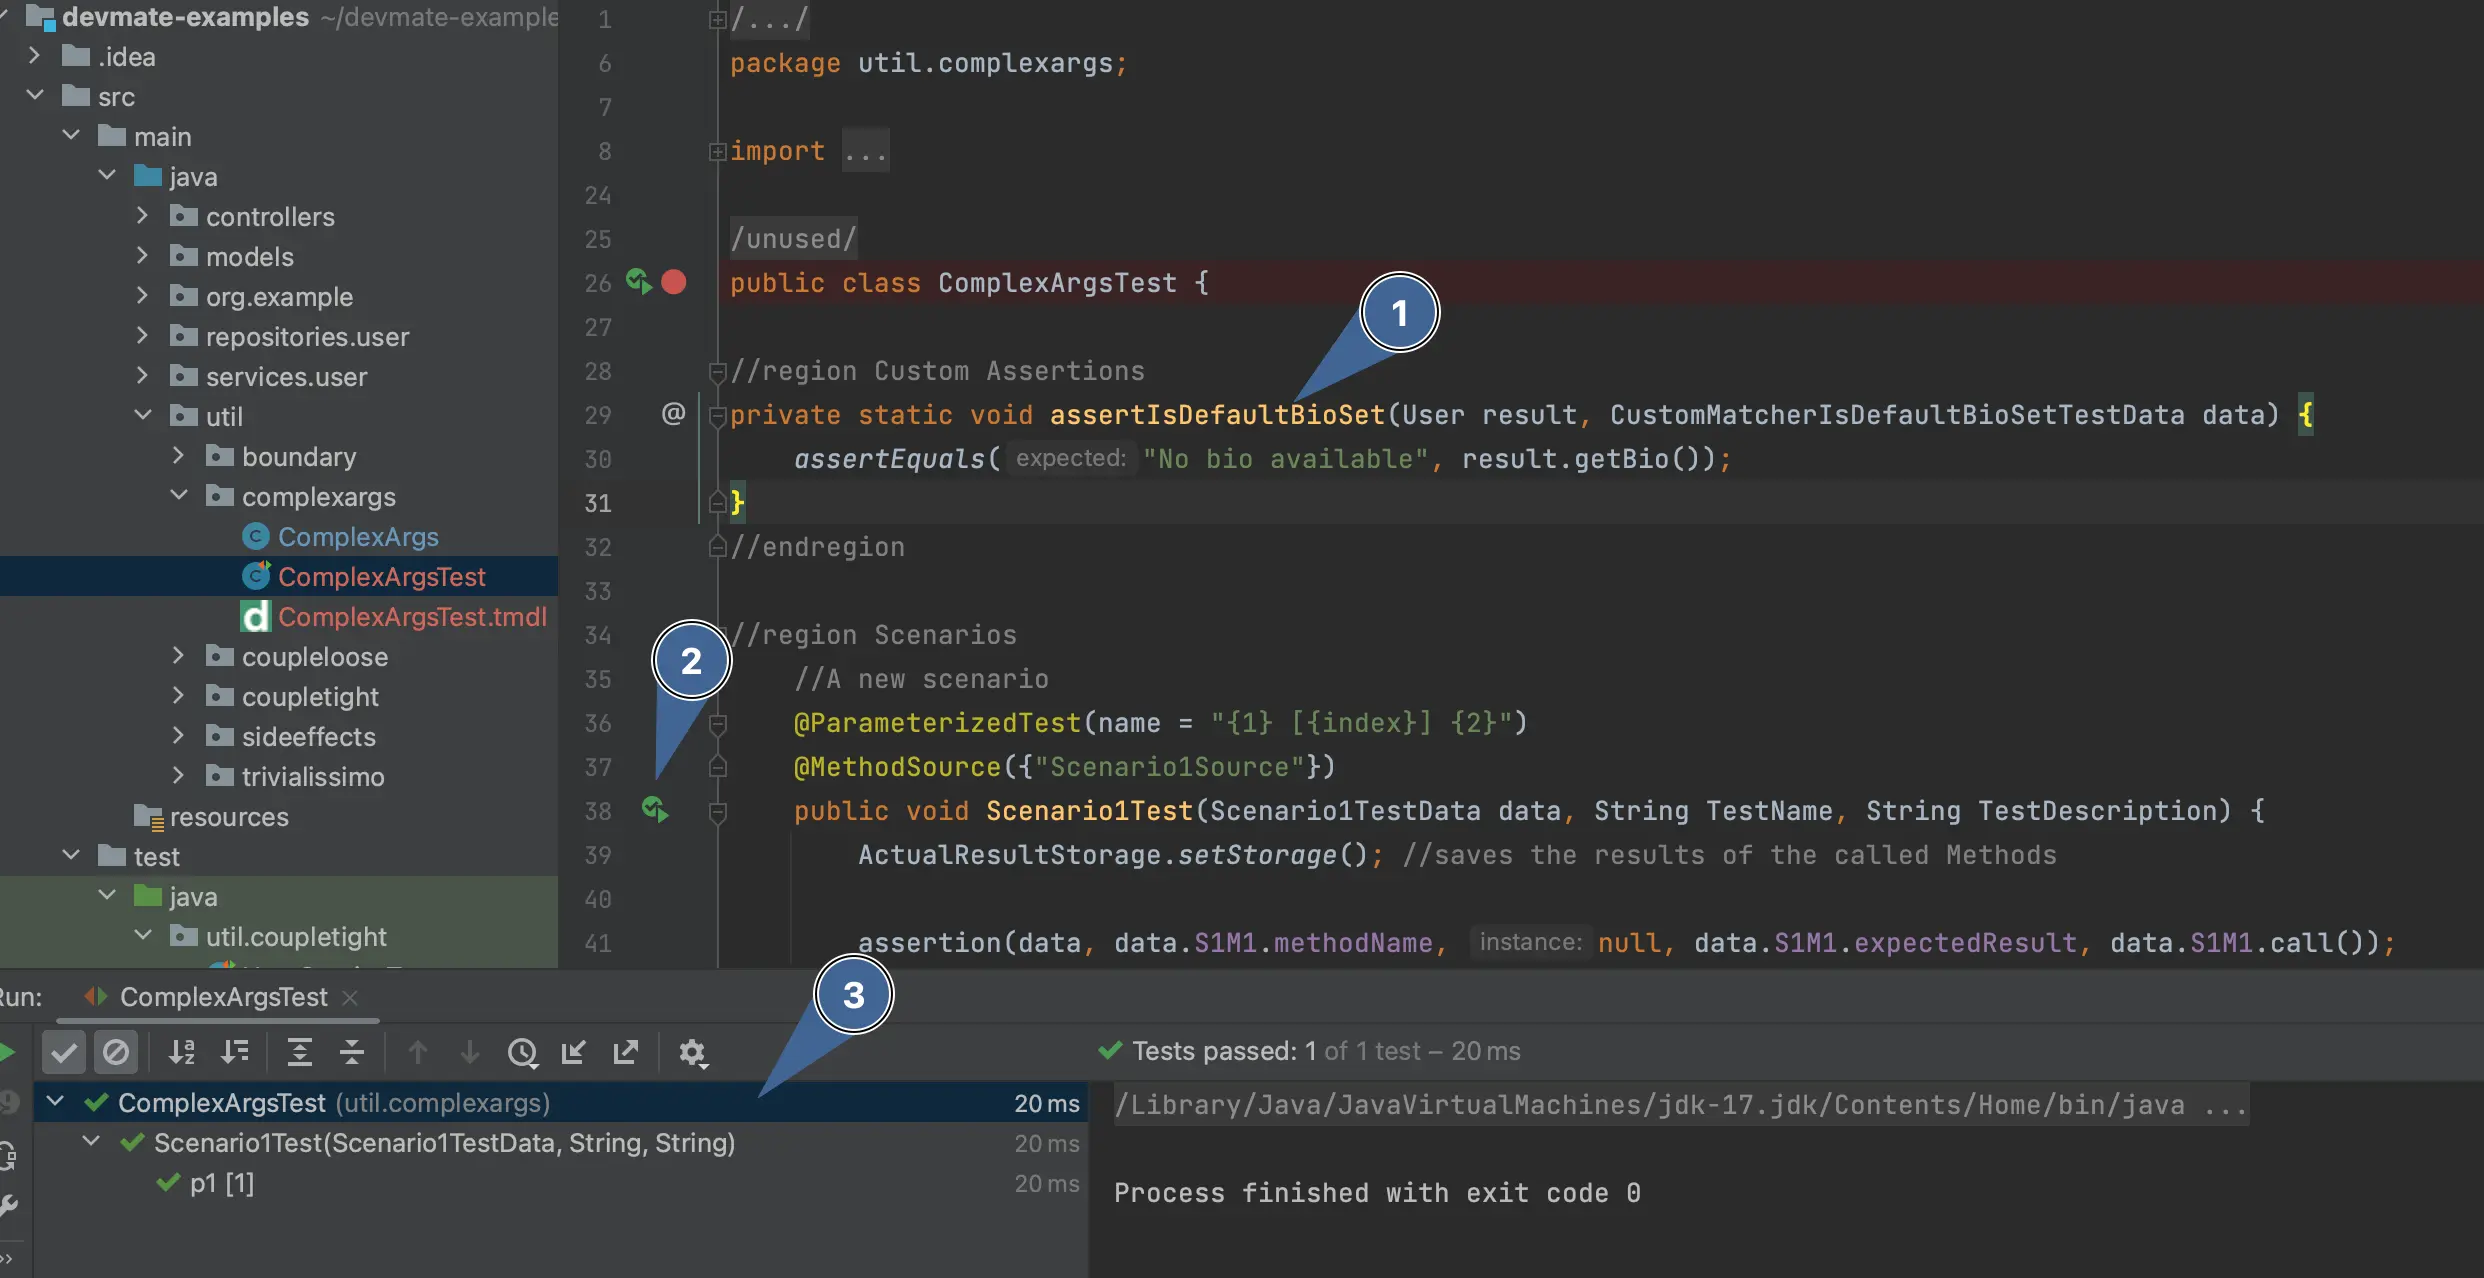
Near the top of the file you can see the Custom Assertion. It will have boilerplate code but here we have replaced it with a basic
assertEquals()statement.You can run the test.
The test has run and passed.
Adding a Custom Assertion - second way
This is a variation on the first way, but it shows how you can pass values into your custom assertion factory method so you don’t have to hard code it.
In the same way we added a custom assertion to valid, add another one.
Click the + icon to add a new custom assertion.
Click the + icon next to valid.
Click in the dropdown and select Add New Custom Assertion Factory, same as before.
We’ll now do something slightly different. We will tell DevMate to pass a parameter to our custom assertion factory method and specify it’s type.
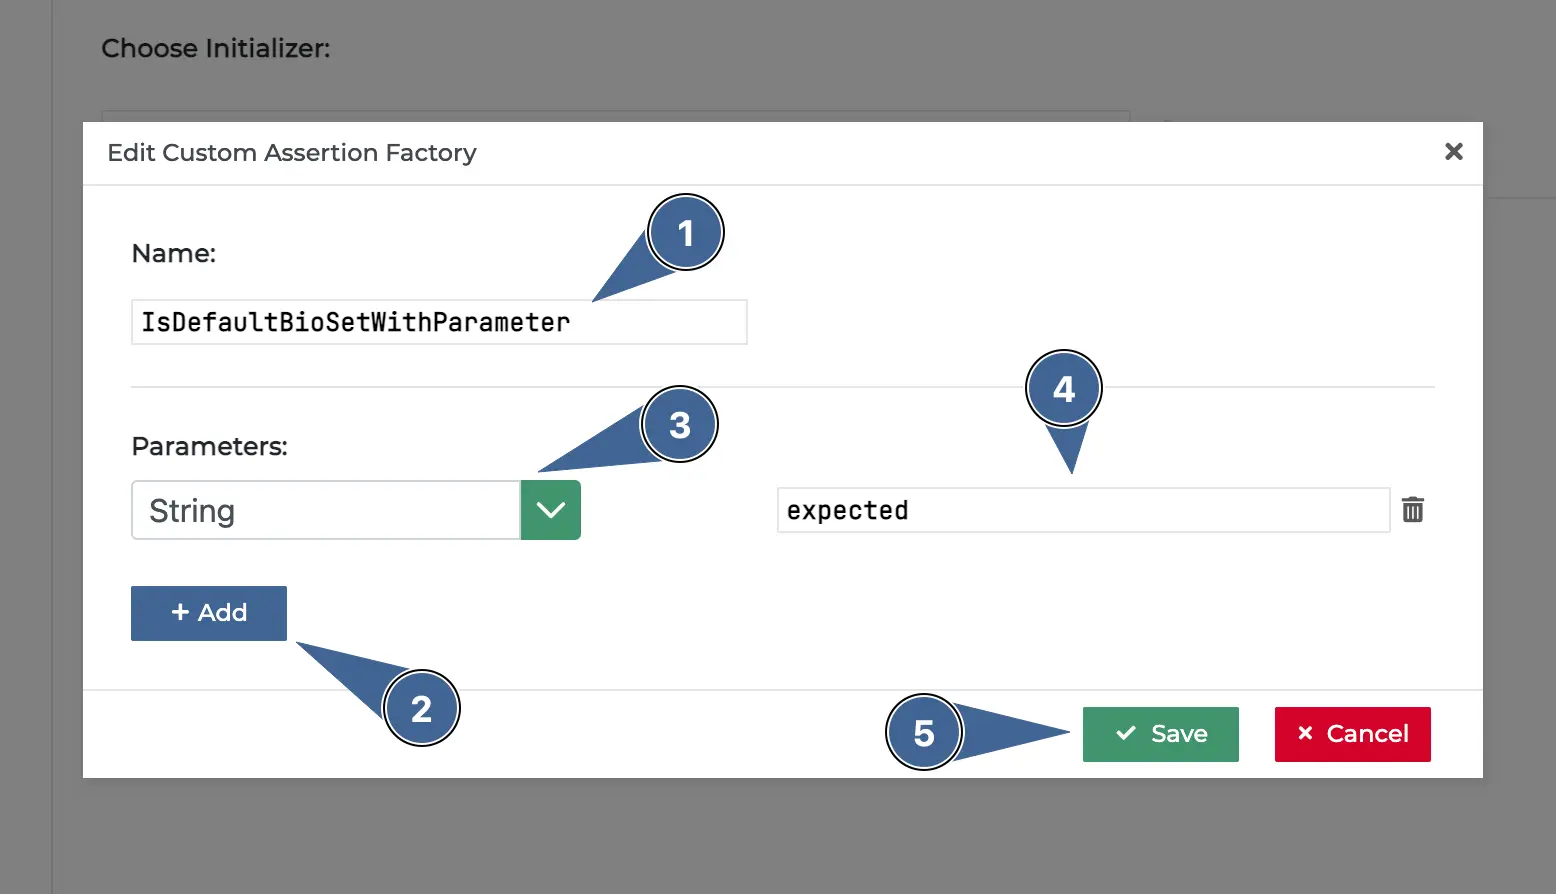
In the popup, enter the a different factory method name, for example
IsDefaultBioSetWithParameter.Press the Add button to add a parameter.
We need to specify the type of this parameter. You can search or open the dropdown list. In our case, we are going to specify the
Stringtype (java.lang.String).We specify the parameter name. As we are passing the expected value to the factory method, we’ll choose
expected.Press Save.
You’ll then see the following screen with the freshly defined parameter available.

Enter the “No bio available” string, which is set in the
setDefaultBioString()method (seeComplexArgs.java).
The advantage of this approach is that if the default string is changed to something different in setDefaultBioString()then we can just change this field to match without having to find where it was hard-coded.
Change to the new assertion
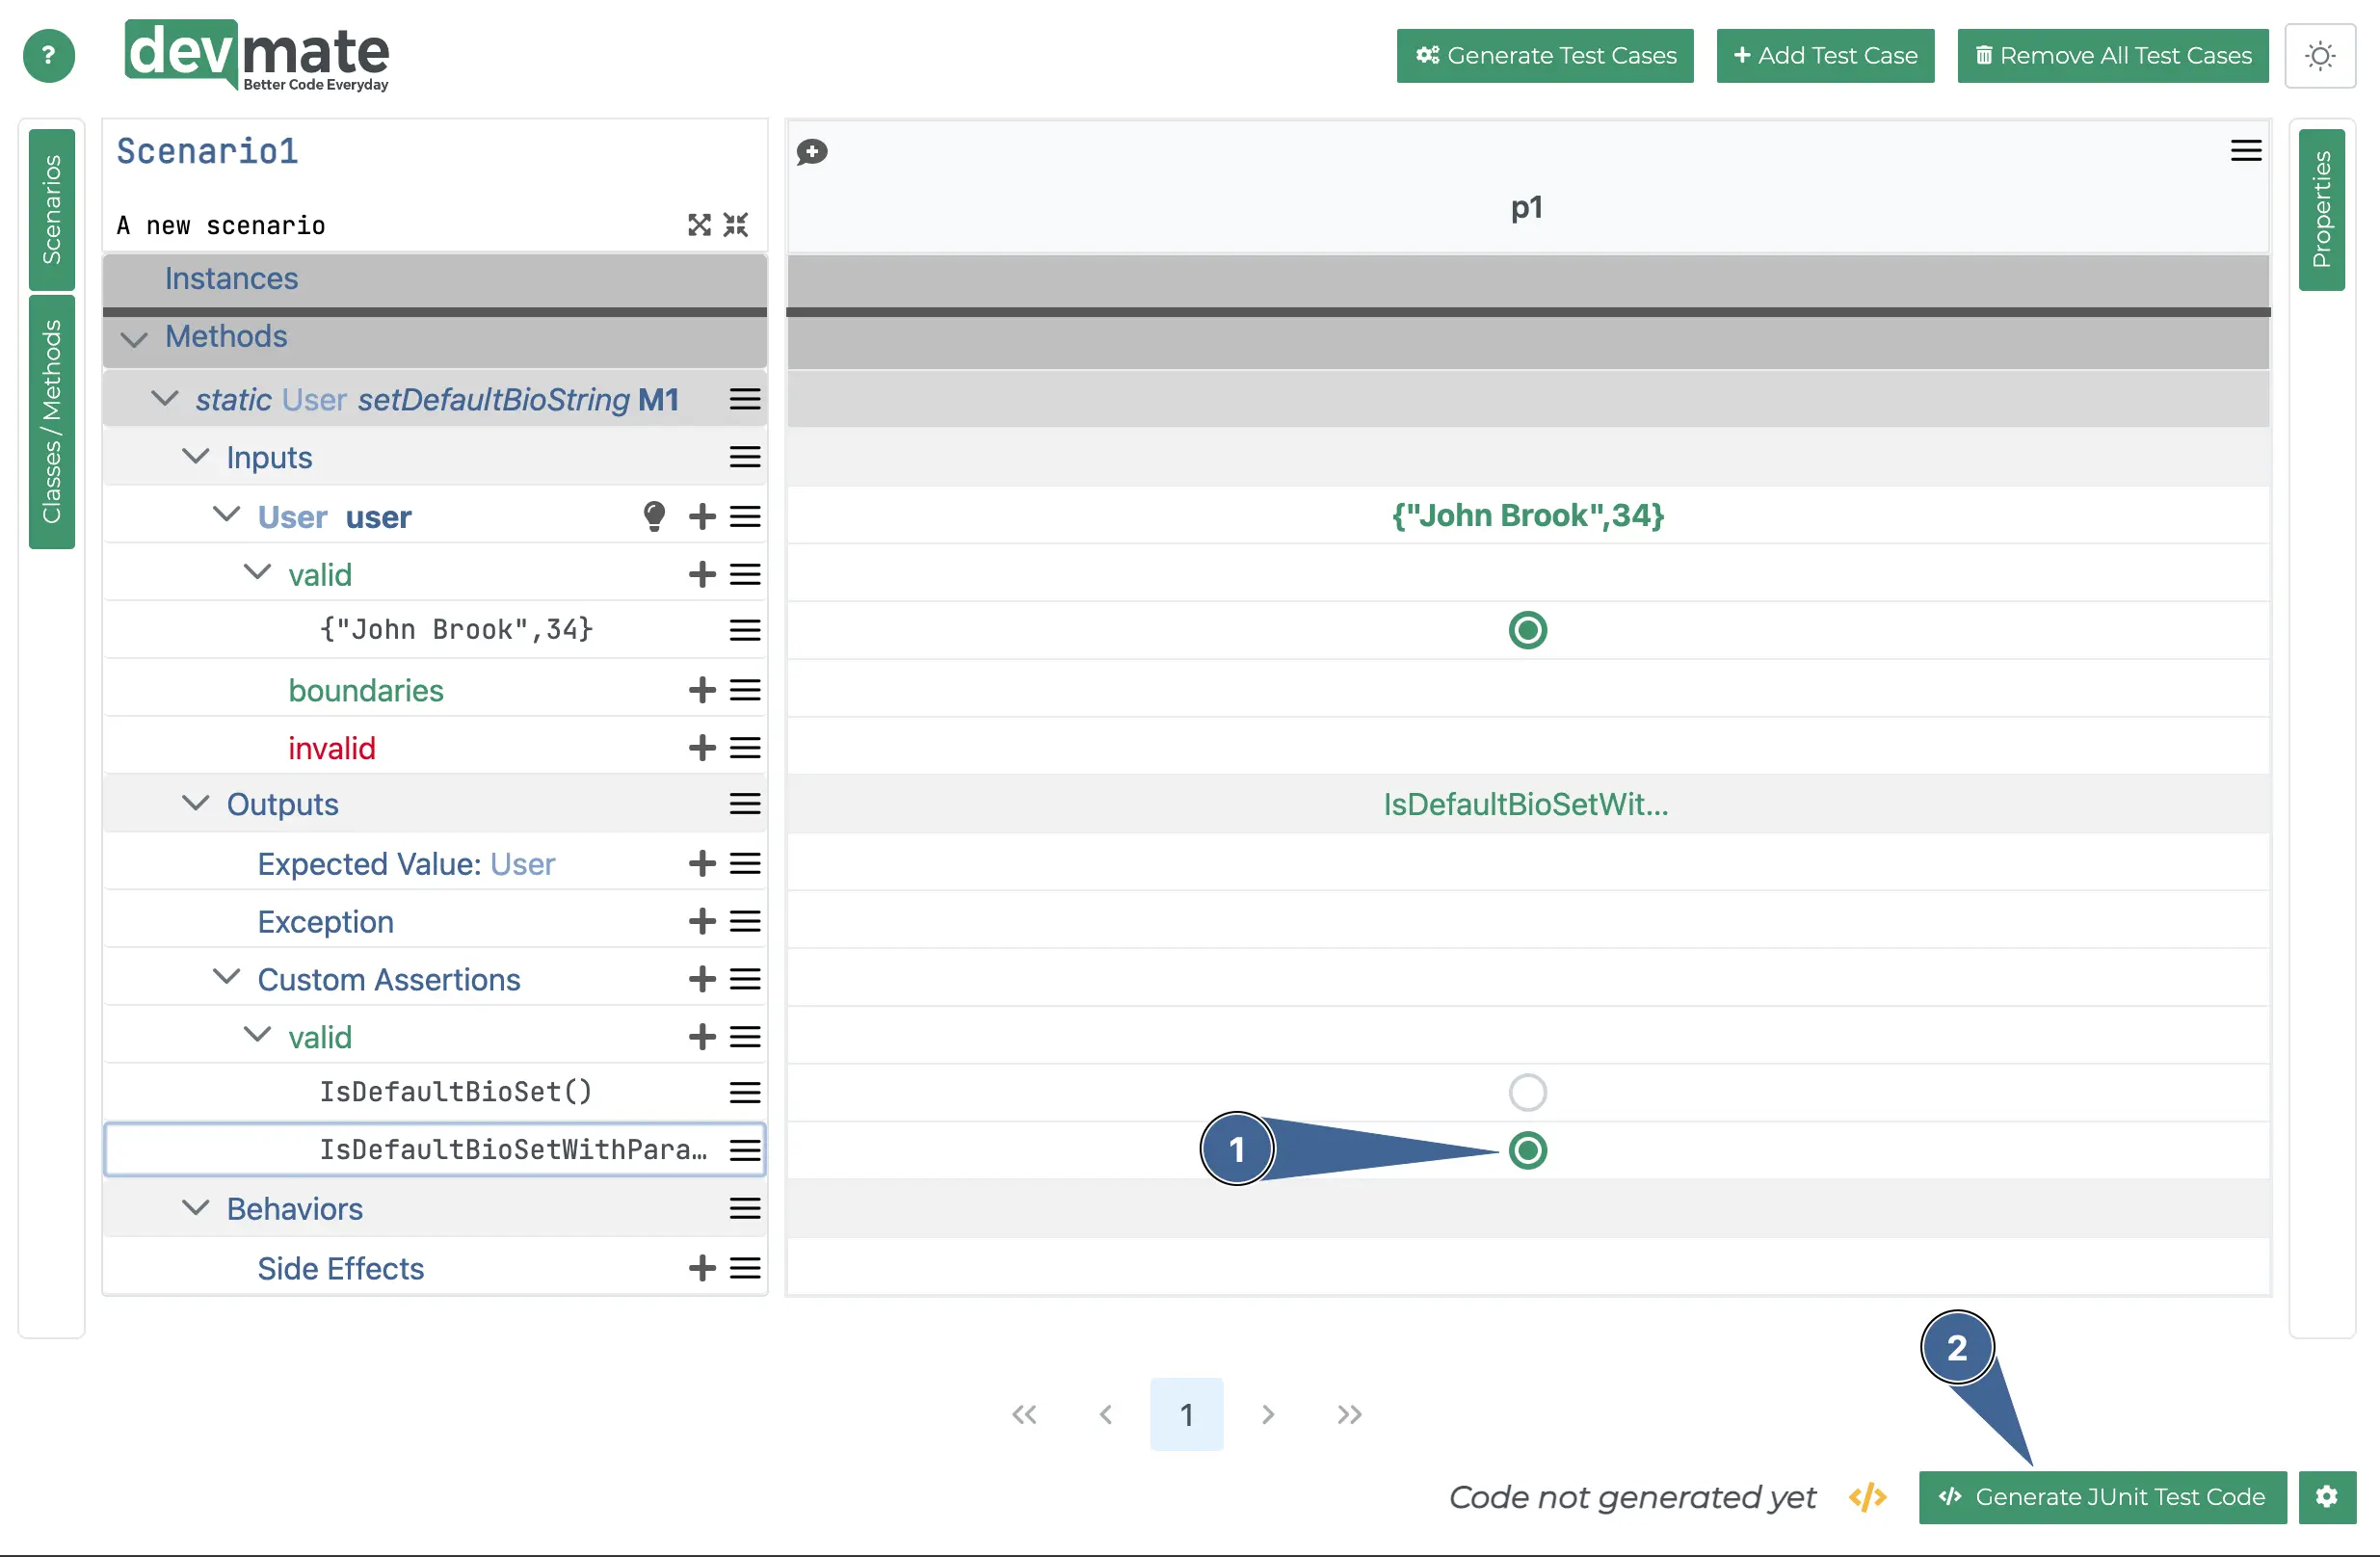
Make sure you first select our new custom assertion by clicking on the corresponding radio button.
Generate the test code.
Editing the Custom Assertion Factory Method code
Below, you can see the generated code (shows IntelliJ, but other IDEs / C# follow the same principle).

Near the top of the file you can see the first Custom Assertion we created.
Here is the new one. It will have boilerplate code when you open it, but here we have already replaced the boilerplate.
You will notice that the expected value parameter is no longer the string literal “No bio available”. When you enter data. in your IDE, the intellisense will show you the available properties. The correct property is hopefully clear. It is the name of the field you created earlier
expectedplusCustomMatcher, yieldingexpectedCustomMatcher.
Run test again and it should pass!
Conclusion
Now you understand the mechanics of custom assertions, you can hopefully see the ways and variations that will work for your real-world use cases.