Scenarios
Scenarios are recommended for testing different methods within the same class.
You could, of course, create different tests and DevMate dialogs for individual methods within the same class and there may be perfectly valid reasons to do so. Using Scenarios has the following advantages.
It just keeps things nice and tidy.
It saves some resources as the
.tmdlfiles can be quite large if the classes are complex.
In the next tutorials, where we discuss complex arguments, custom assertions and side effects we will be using Scenarios.
Github
You can find the code relating to this tutorial on Github in the /java/util/complexargs folder.
Test first method
Grab the code from Github and open up the ComplexArgs class in the /java/util/complexargs folder.
Right click on the setDefaultBioString() method and select Test with DevMate. You will now see the following.
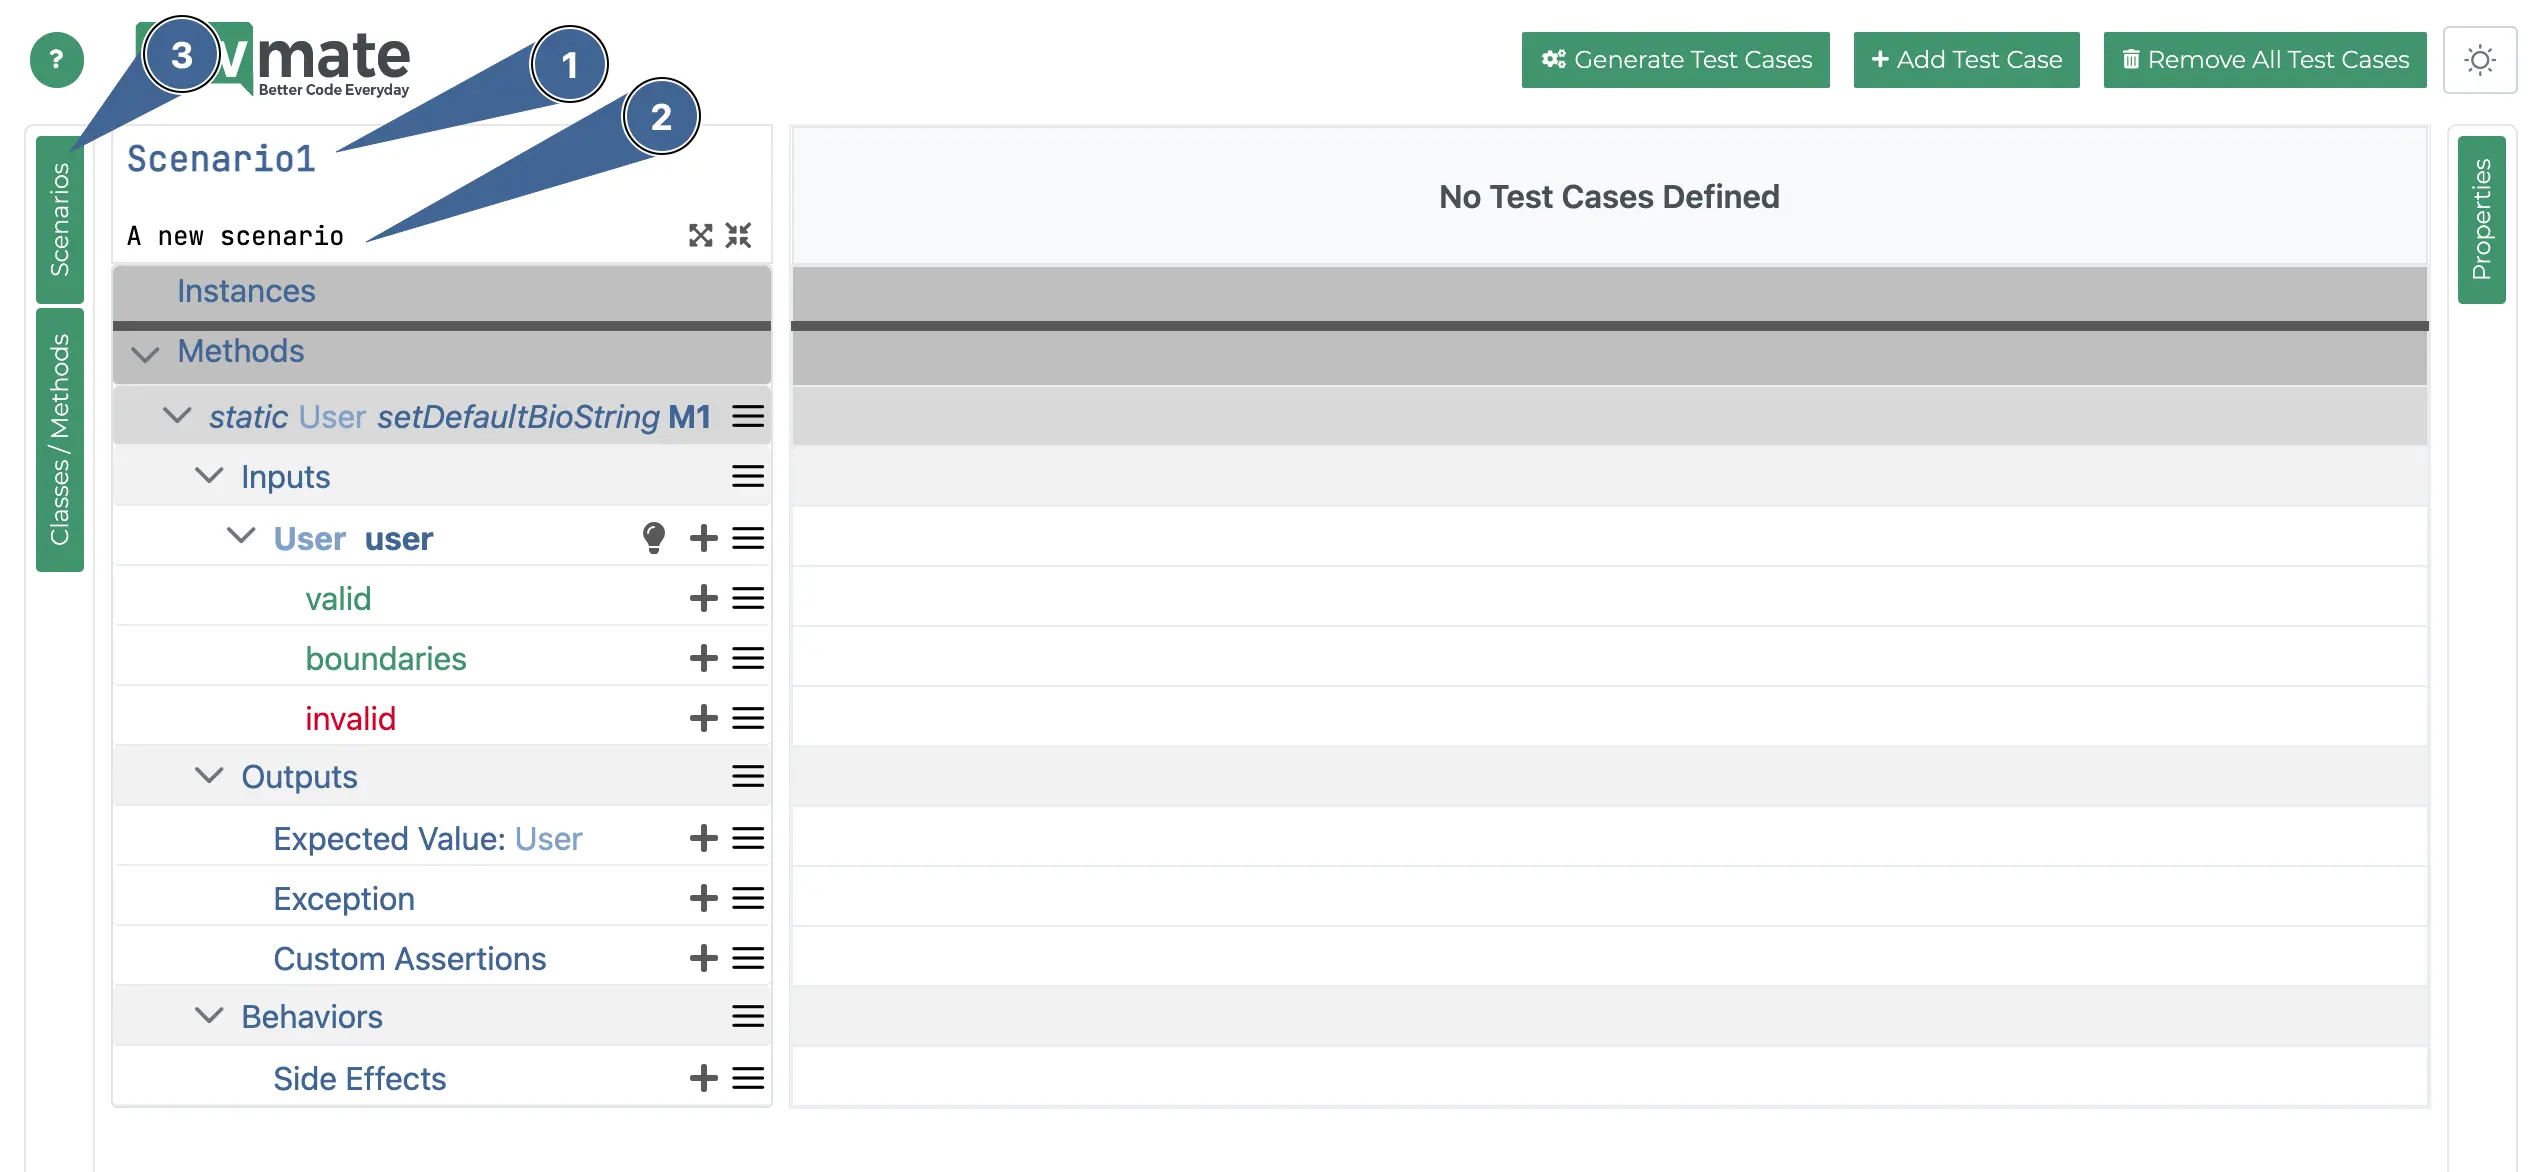
The first scenario is always called Scenario1 by default. You can double-click at any stage to edit it. This field ends up in the generated code, so it cannot contain spaces or anything that will upset the compiler.
This is a description of the scenario. This is used to make things clearer to the user. It also ends up in comments within the generated code.
This is the main scenarios tab. You can click on it to switch between scenarios and add and delete scenarios.
Renaming Scenario1 and its description
Go ahead and change the name and description of the scenario to anything you like, maybe “DefaultBioString” and “Setting default bio string if it’s empty”.
Adding a new scenario
Click on the Scenarios tab
Click the + icon to add a new scenario.
Click the Scenarios tab again to close the left panel.
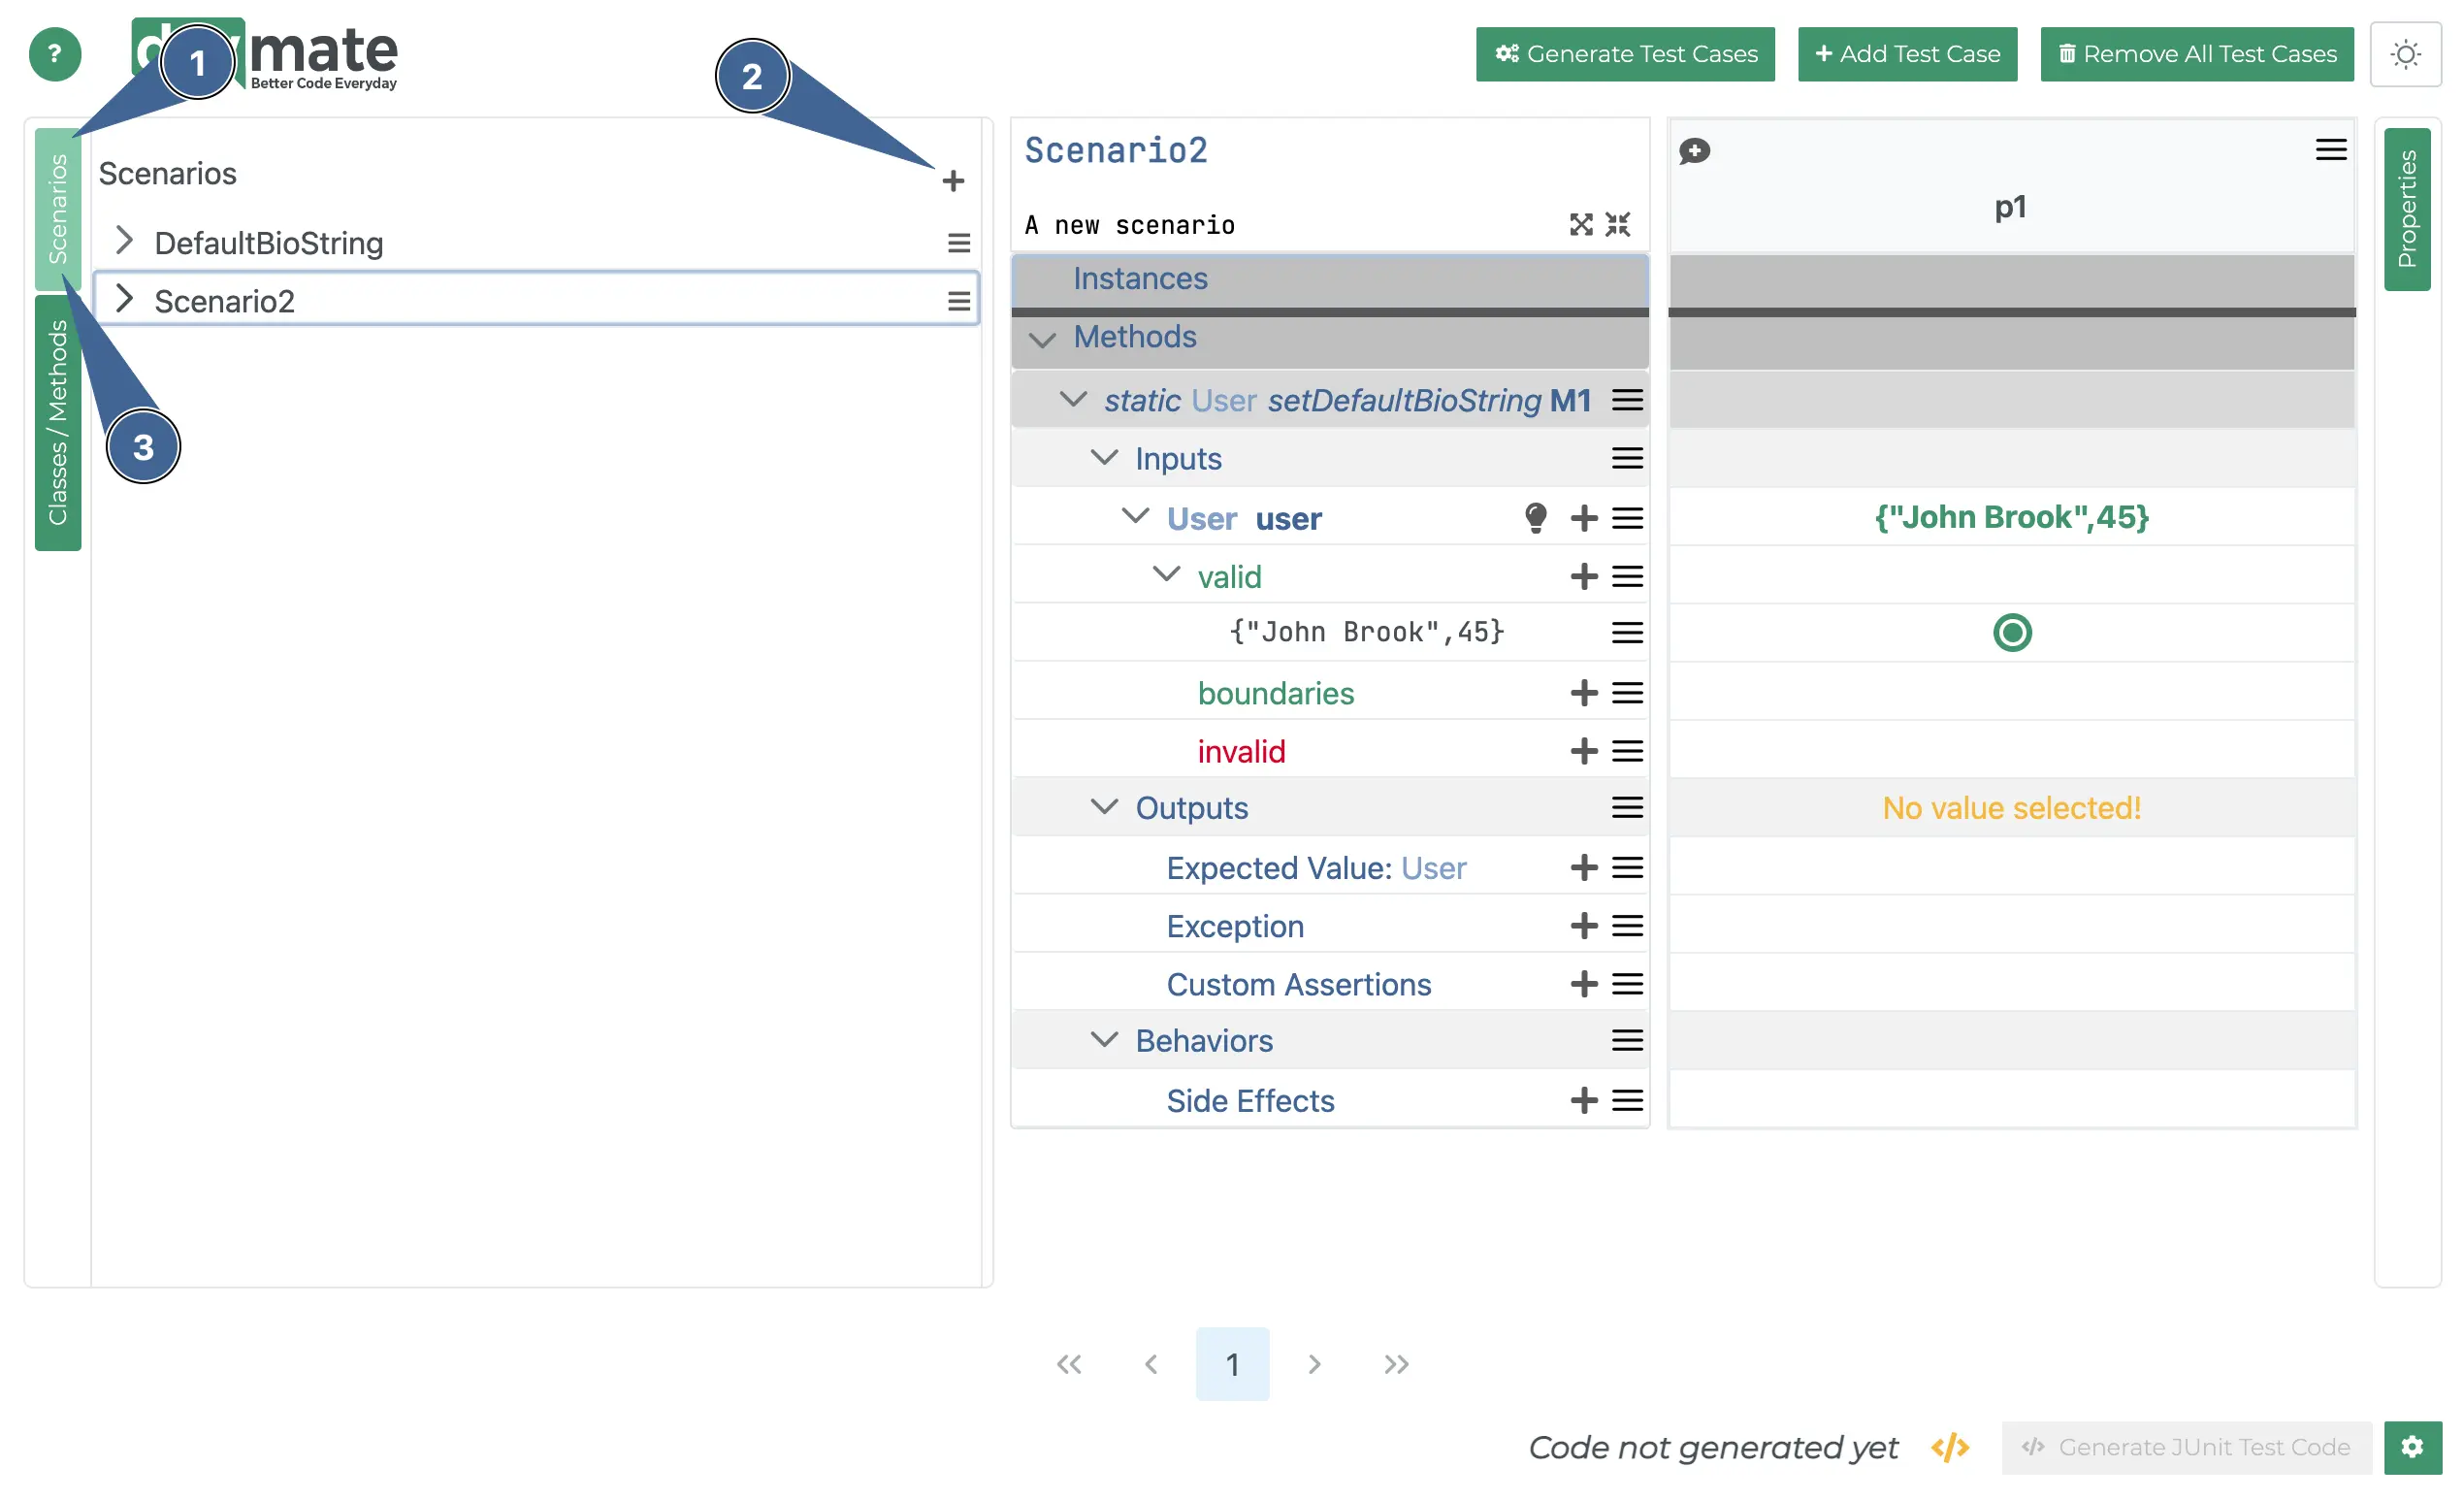
You will notice that the previous scenario’s method will be copied and appear on the right hand side.
You might want to rename the new Scenario appropriately.
Switching between scenarios
You can switch scenarios by opening the scenarios panel and clicking.
Replacing the method
In our case, we don’t want to do another test on setDefaultBioString() method. We want to add the deleteBioString() method instead.
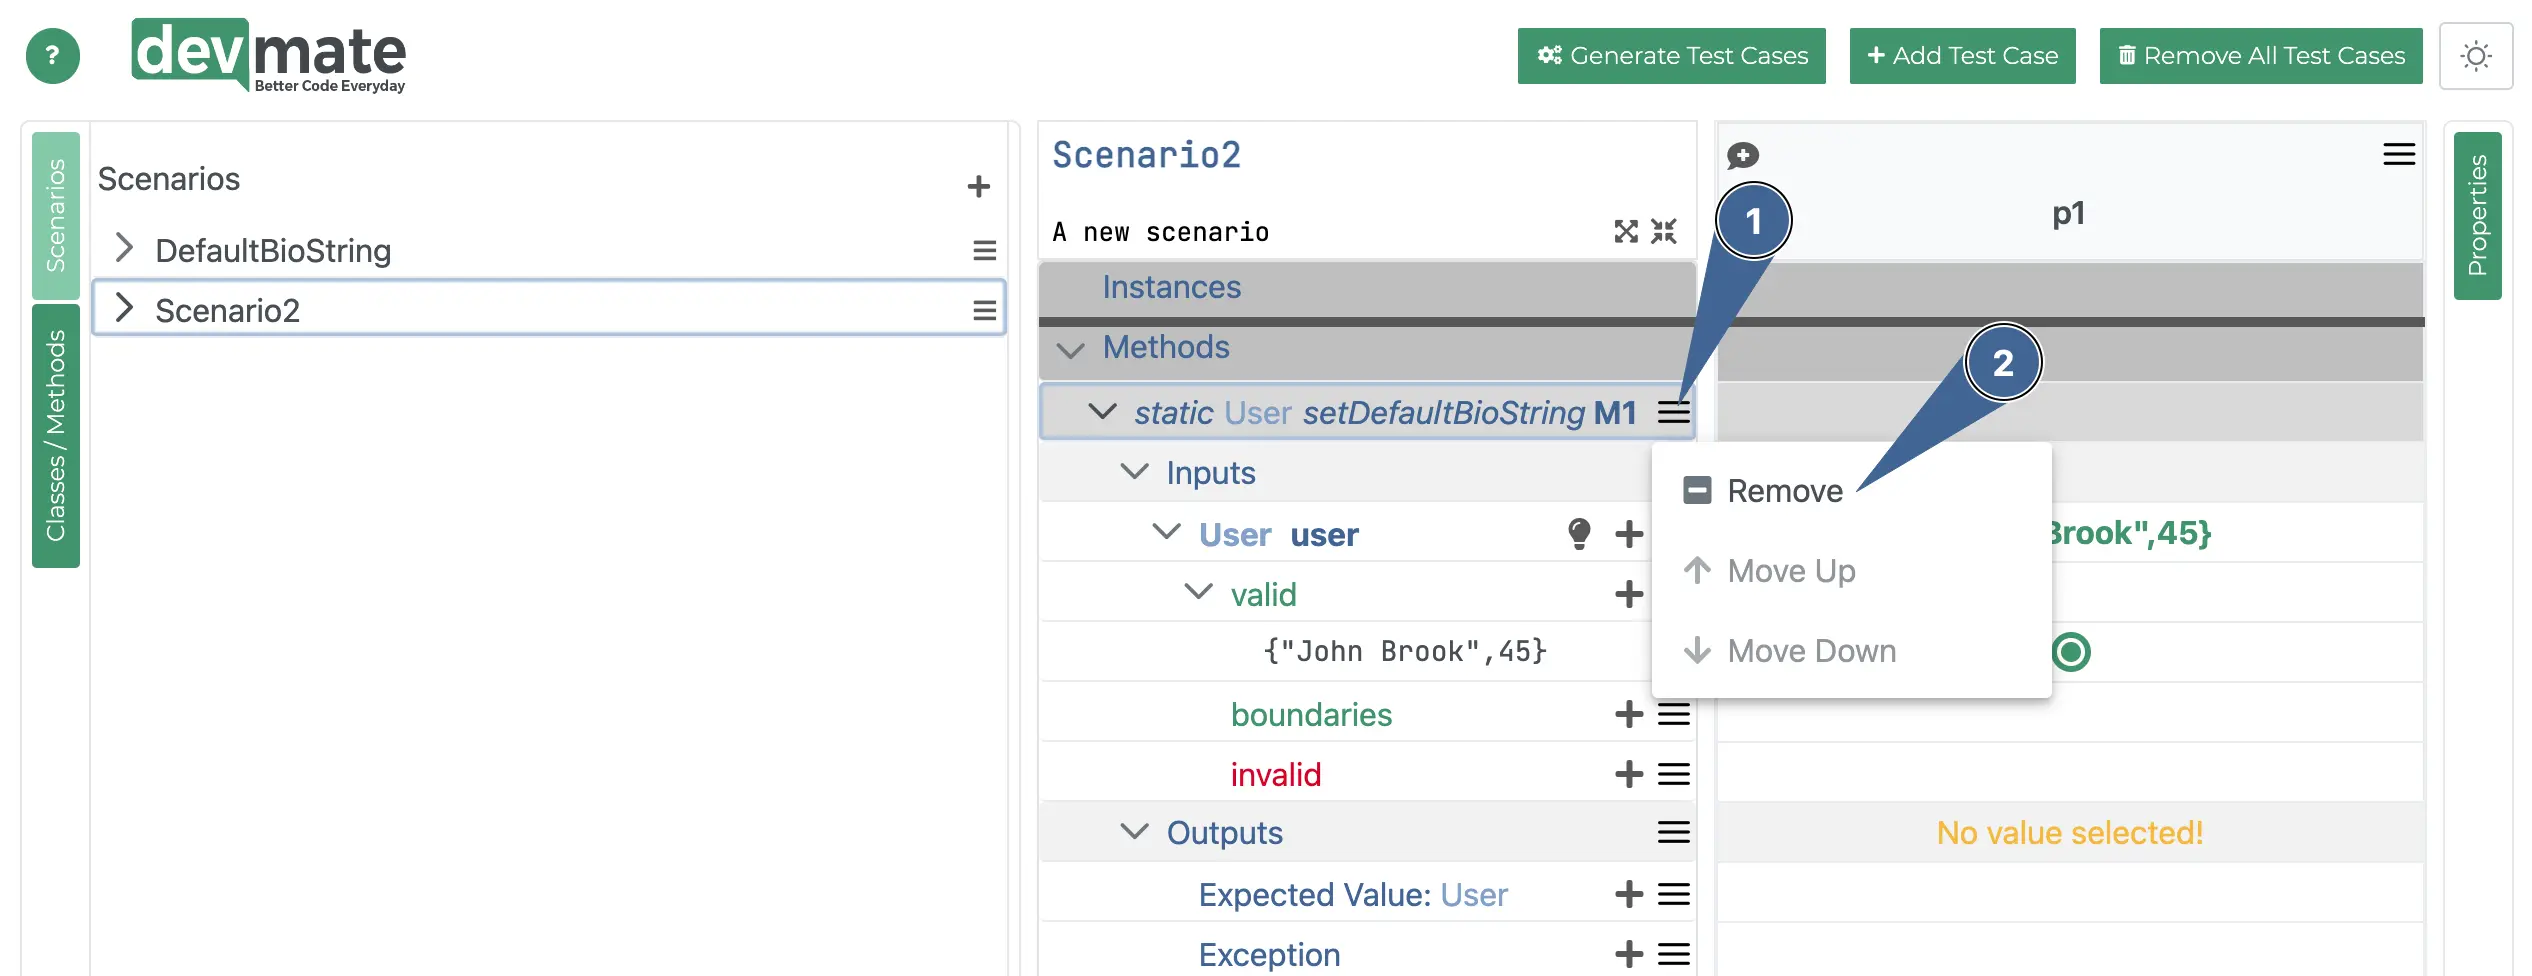
Firstly, we want to remove the existing method.
Click the hamburger icon
Click Remove
Adding the method we want
We want to add in the deleteBioString() method instead.
Click on the Classes/Methods tab.
You can either scroll through the Available Classes/Methods list or search for the method as shown here.
Right click on the method or click the hamburger icon and select Add to active scenario.
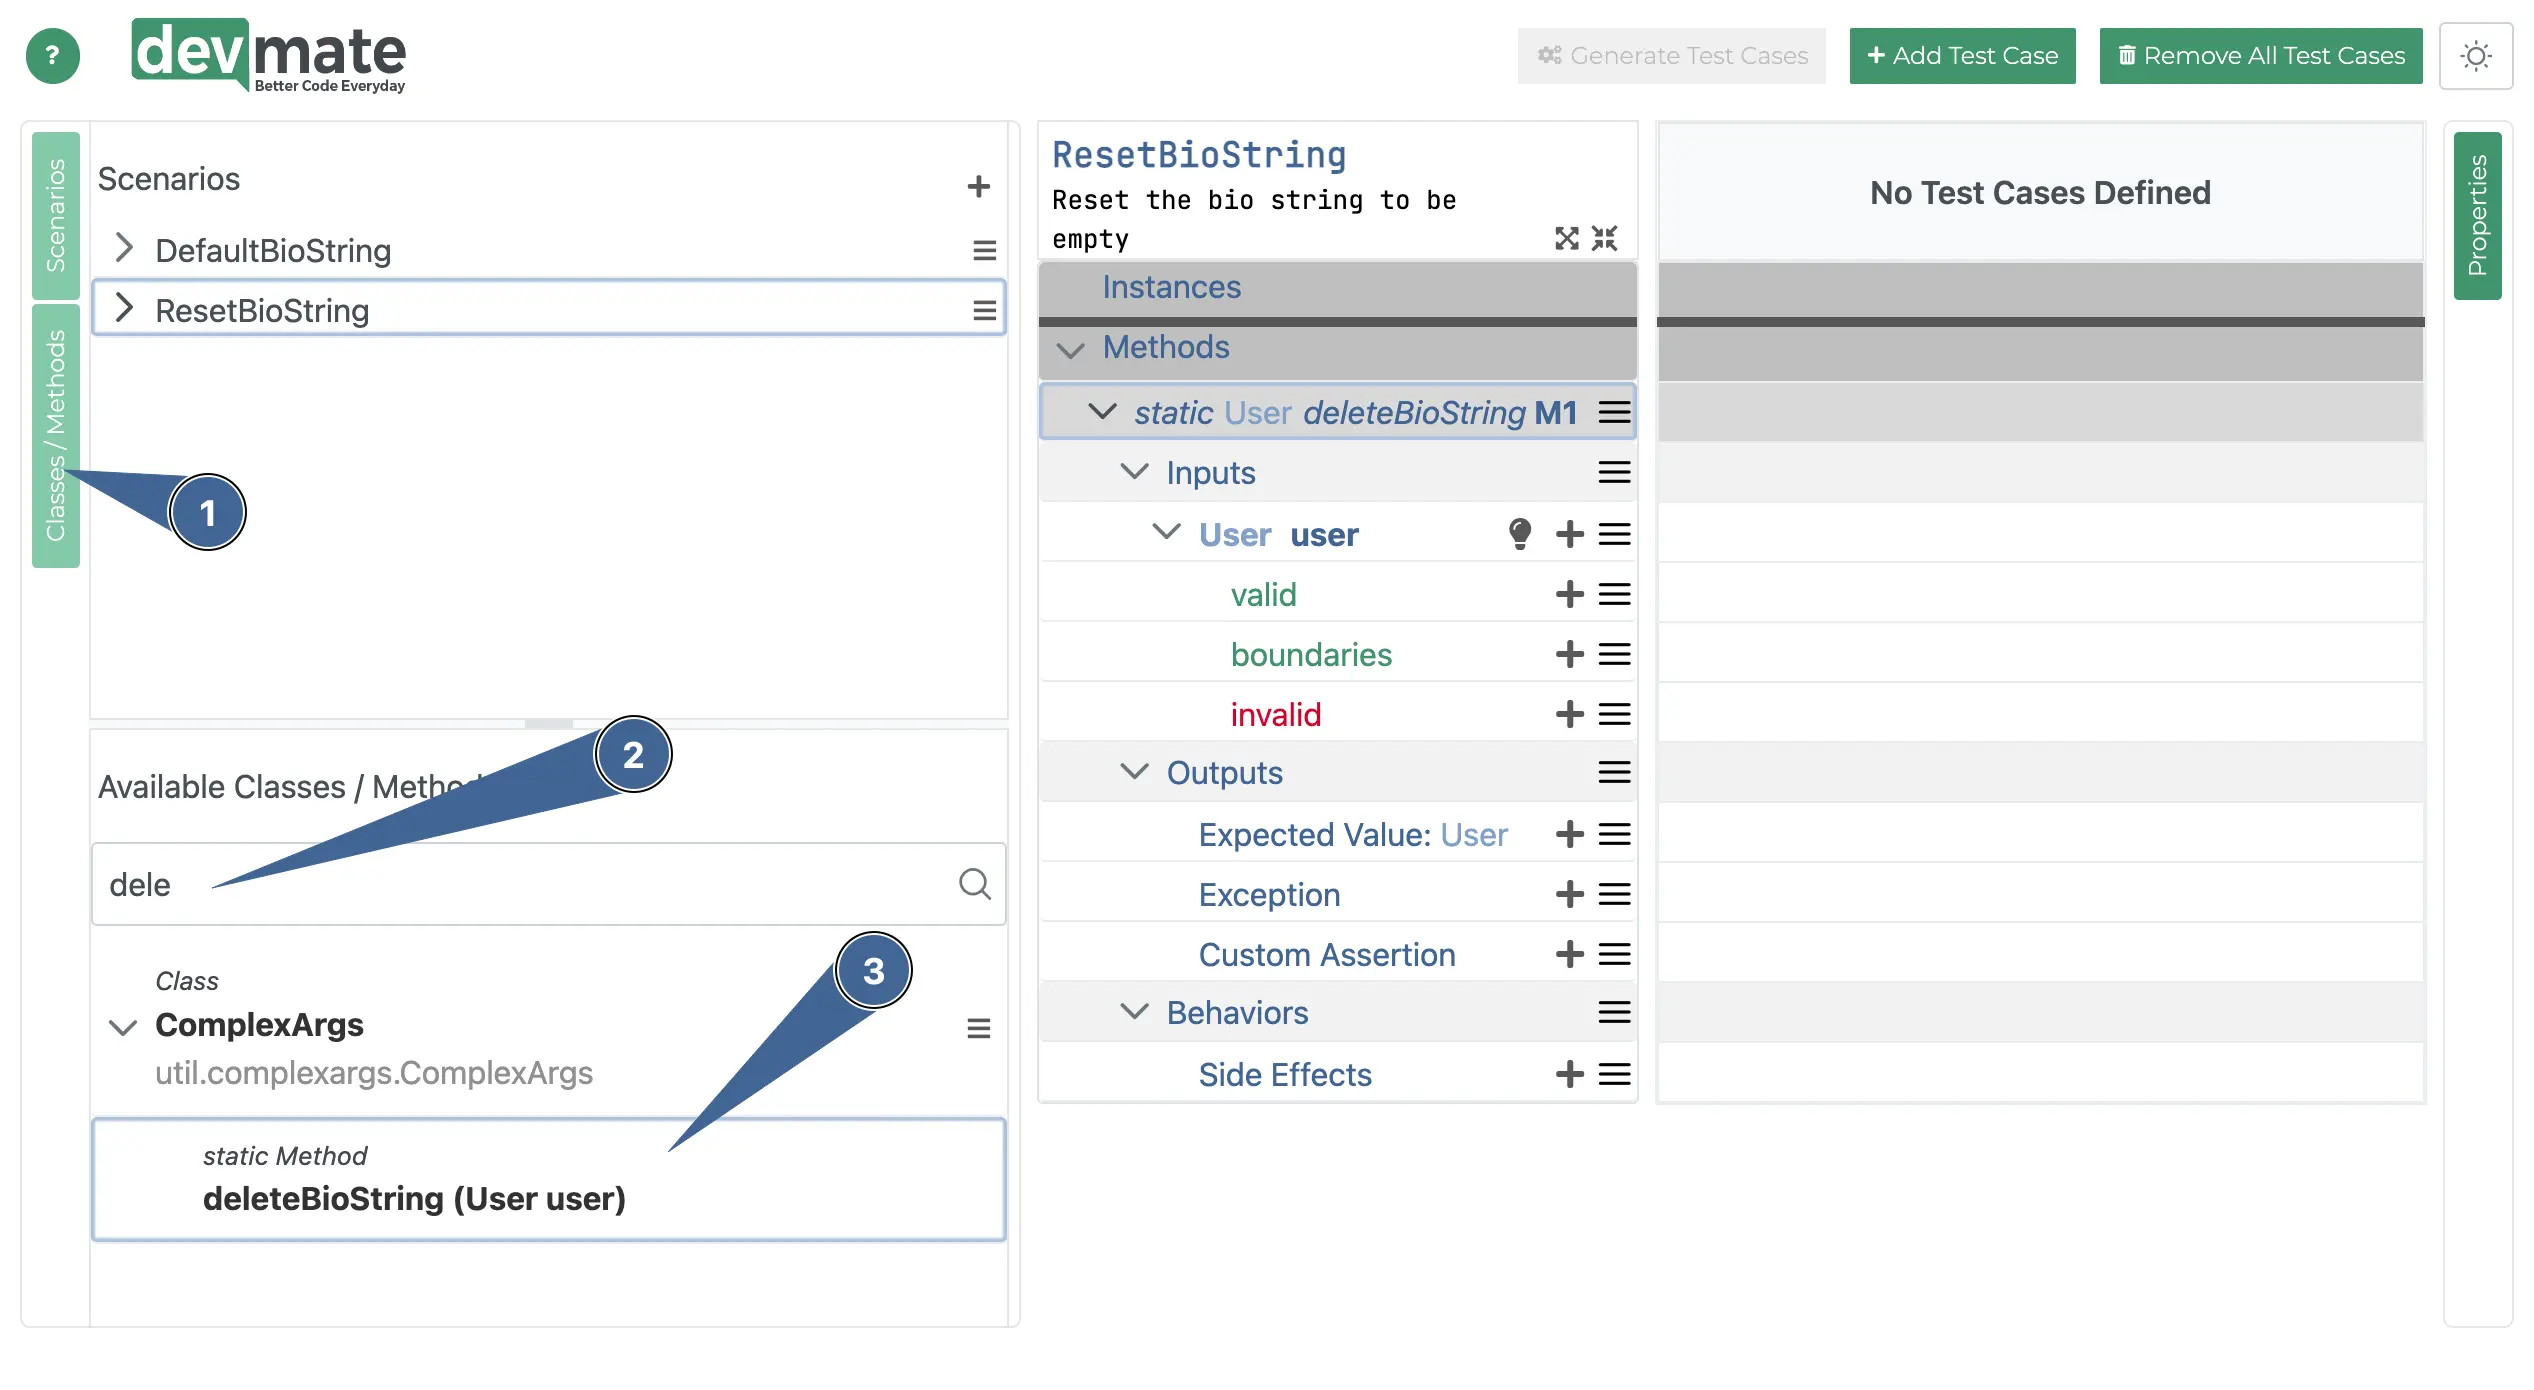
Once you’ve done step 3. you’ll see deleteBioString() added in correctly. We've also renamed the Scenario and its description.
Generating code
When you generate the test code by pressing the Generate Test Code button, both scenarios will be included.